NZXT Havik 140 Heatsink Review
Author: Dennis Garcia
Published: Thursday, February 16, 2012
Installation
As heatsinks have matured you'll notice that they typically install the same way and with the same basic hardware. We'll get to the specifics a little later but first we wanted to show you some of the really cool packaging the NZXT Havik 140 comes with.
Here you will see that each part comes packed in their own closed cell foam trays.
Here you will see that each part comes packed in their own closed cell foam trays.

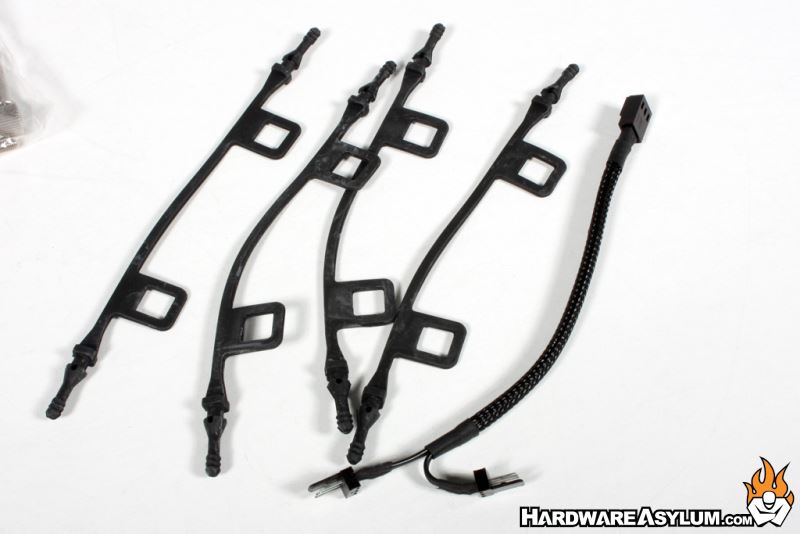
Included hardware consists of the normal mounting plates, screws and spacers. To mount the fans you get four thin rubber threads that attach to each corner of the fan and stretch clip to each side of the heatsink. You also get a fan splitter so you can power both fans from a single fan header.
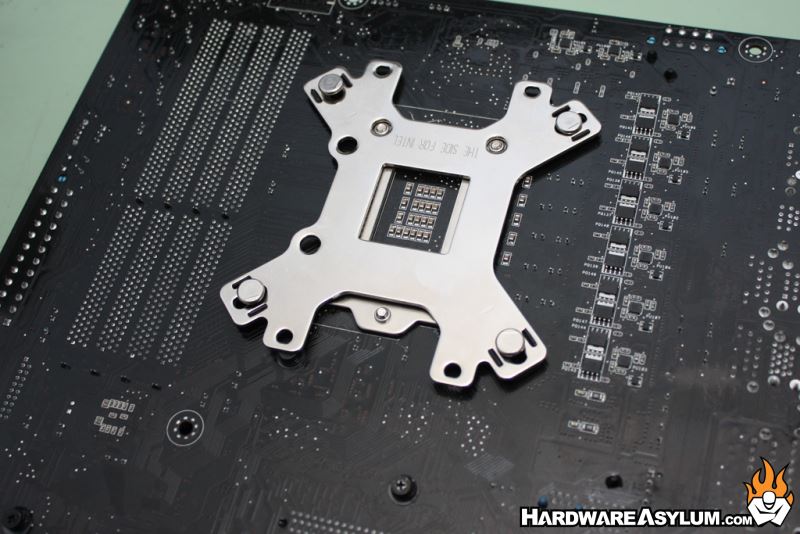
The first steps to install the heatsink will be to assemble the back plate and push the mounting screws thru the appropriate holes. We are using the Sandy Bridge platform for this review so be sure to line up the backplate properly so the screws pass thru the provided holes in the backplate.
The first steps to install the heatsink will be to assemble the back plate and push the mounting screws thru the appropriate holes. We are using the Sandy Bridge platform for this review so be sure to line up the backplate properly so the screws pass thru the provided holes in the backplate.

Flipping the board over you'll position the plastic risers over the mounting screws and install the mounting plates.
These plates are held in place with thumb nuts and should be secured finger tight.
These plates are held in place with thumb nuts and should be secured finger tight.

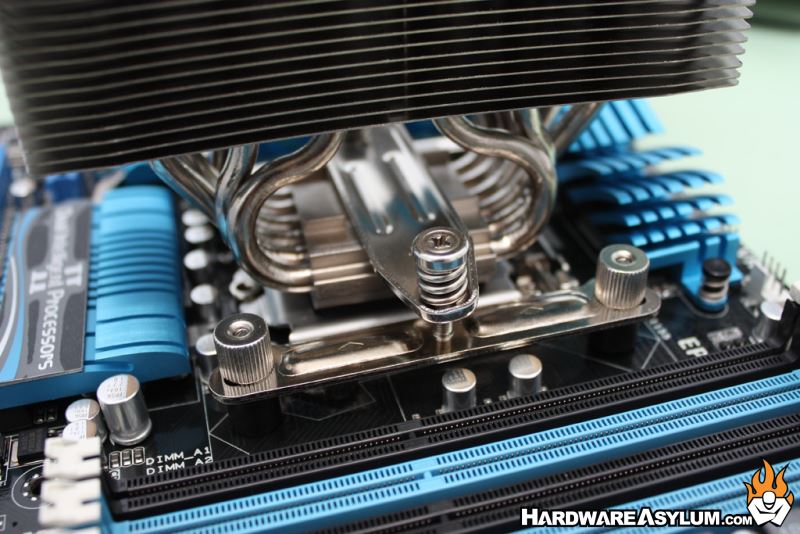
The final step will be to apply your favorite thermal paste and position the heatsink so the cross plate can make contact with each of the mounting plates. Using a Philips screwdriver tighten each screw, progressively, until they stop.
Install the dual fans and you're set and ready to roll.
Install the dual fans and you're set and ready to roll.