MSI X99A Godlike Gaming Motherboard Review
Author: Dennis GarciaBoard Layout and Features
The MSI X99A Godlike is a full ATX motherboard featuring a matte black PCB complete with black heatsinks with red accents made of anodized aluminum. To complement the ornate heatsinks you will also find a fitted aluminum shroud that covers the I/O connections and many of the parts between the individual PCI Express slots.
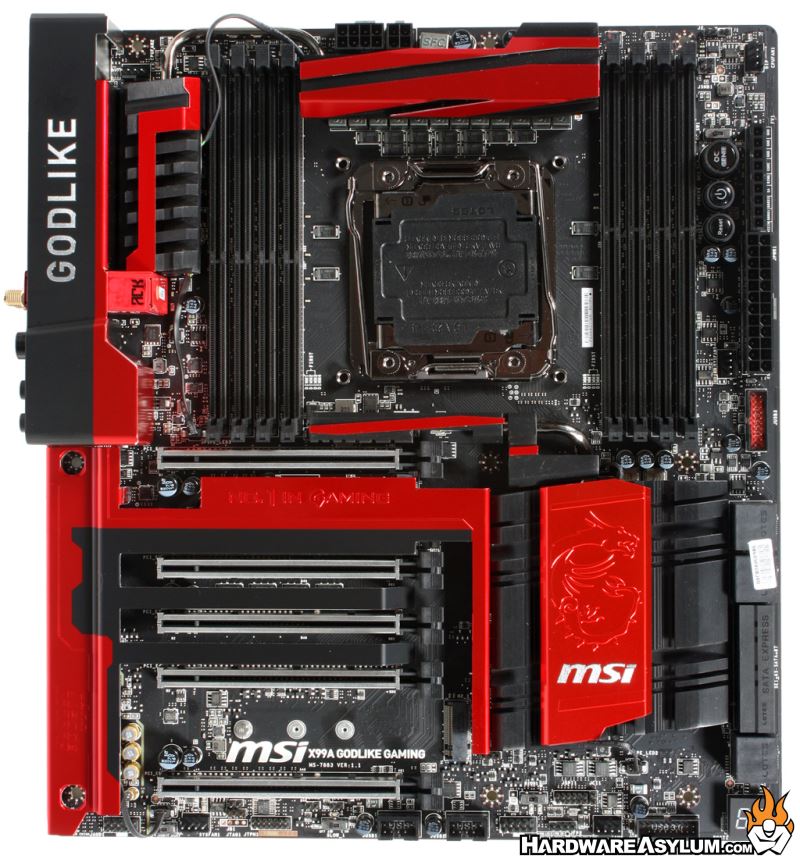
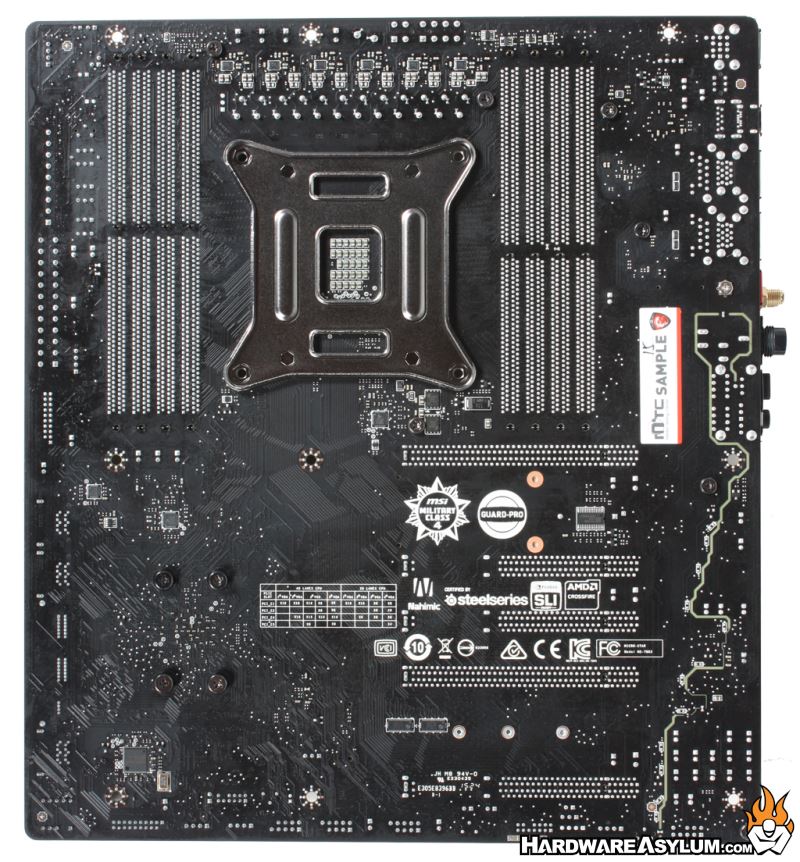
Looking at the back of the motherboard can give you an indication as to how the PCI Express slots are wired and determine which slots are primary and secondary in terms of bandwidth. You won't find any surface components aside from the large cpu backplate and a few screws for the various heatsinks.
On the X99A Godlike you will find a total of twelve power phases for the CPU, Ring and PCI Express.
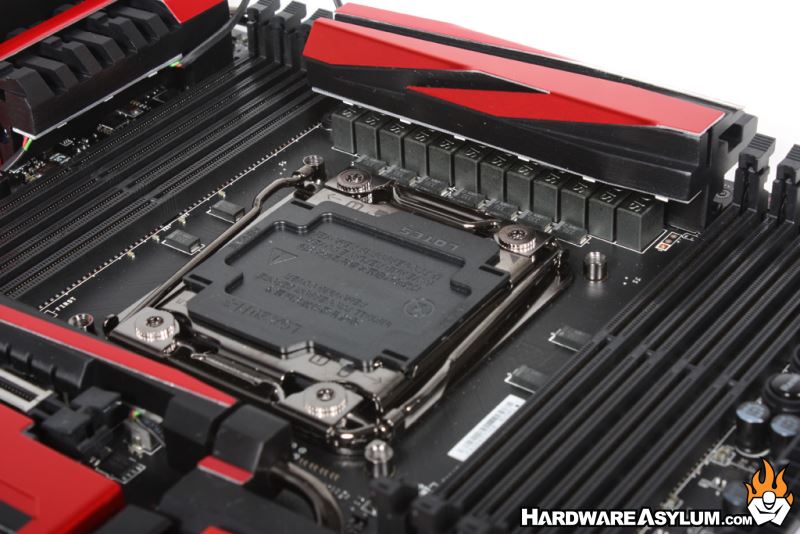
While we are on the subject of CPU I would like to direct your attention to the CPU socket, namely the heatsink mounting holes. I have seen two types of CPU sockets over the years. The first is the recommended Intel design that has the screw holes surface mounted to the top side of the motherboard. The better design, like the one used on the MSI X99A Godlike, has the same screw holes passing thru the backside of the motherboard and attached to an extremely sturdy CPU backplate.
Not only is the area around the CPU socket cleaner but ensures that the motherboard will not flex under heatsink pressure. The added strength is also beneficial for heavier heatsinks, waterblocks and LN2 containers making it travel resistant for those times when you cart your system around to LAN parties or in and out of the dorm room.
Quad channel memory comes standard on the LGA 2011 platform and the X99A Godlike supports DDR4 modules up to 3400Mhz with a maximum of 128GB usable. 24pin ATX power is located in the traditional location near the upper edge of the motherboard and out of the way of most intake fans.
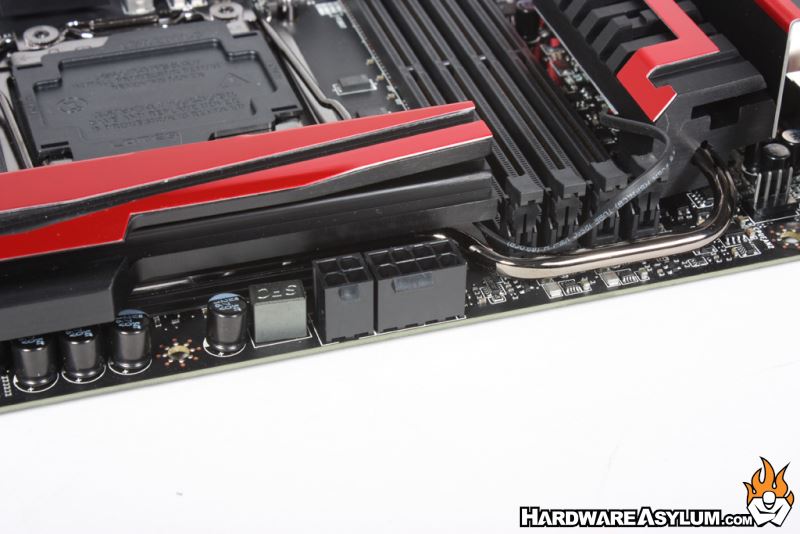
Behind the PWM cooler you'll find the CPU Power connection made up of a single 8-pin and 4-pin connectors. Given the location the cables they should be easy to hide in any modern chassis and is well hidden behind the large VRM cooler.
You will notice in the above photo that there is a dark nickel plated heatpipe connecting the VRM cooler to a supplemental heatsink near the I/O connectors. Unlike on some motherboards the four motherboard heatsinks are not directly connected thus splitting the cooling duties in two. This is actually a really good idea given that the secondary heatsinks, located near the I/O and above the number on PCI Express slot work to increase cooling capacity and will not interfere with each other. I would have liked to see a much larger diameter heatpipe but it really isn’t needed.