Mounting a LGA1366 waterblock on a LGA2011 Motherboard
Author: Dennis Garcia
Published: Wednesday, December 07, 2011
Installing the Waterblock
The second method is a little simpler and requires a few parts you can pick up from the local hardware store.
(Well, this isn't entirely true. The threaded holes are 4mm so for those of us in the USA will need to order most of the items, from the local hardware store )
)
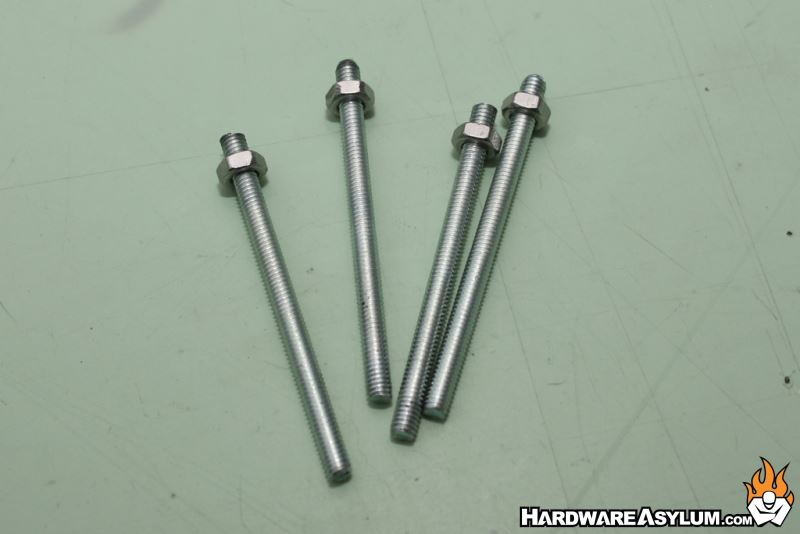
My challenge was to mount a Danger Den TDX-MC waterblock on my Gigabyte X79-UD7, the included hardware was imperial thread and relied on having access to the PCB to secure the threaded rods. Neither of these would work on LGA2011 so I instead picked up several 4mm metric screws and chopped the heads off using my Dremel tool. These will become the replacements for the included hardware and simply use the threaded holes as mounting points. 4mm nuts were used to lock the screws in place. Everything only needs to be finger tight so put away those torque wrenches.
(Well, this isn't entirely true. The threaded holes are 4mm so for those of us in the USA will need to order most of the items, from the local hardware store
My challenge was to mount a Danger Den TDX-MC waterblock on my Gigabyte X79-UD7, the included hardware was imperial thread and relied on having access to the PCB to secure the threaded rods. Neither of these would work on LGA2011 so I instead picked up several 4mm metric screws and chopped the heads off using my Dremel tool. These will become the replacements for the included hardware and simply use the threaded holes as mounting points. 4mm nuts were used to lock the screws in place. Everything only needs to be finger tight so put away those torque wrenches.

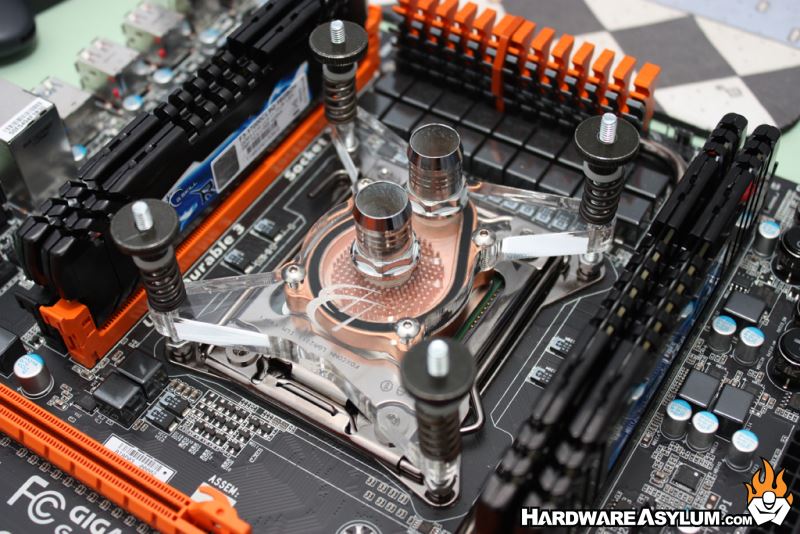
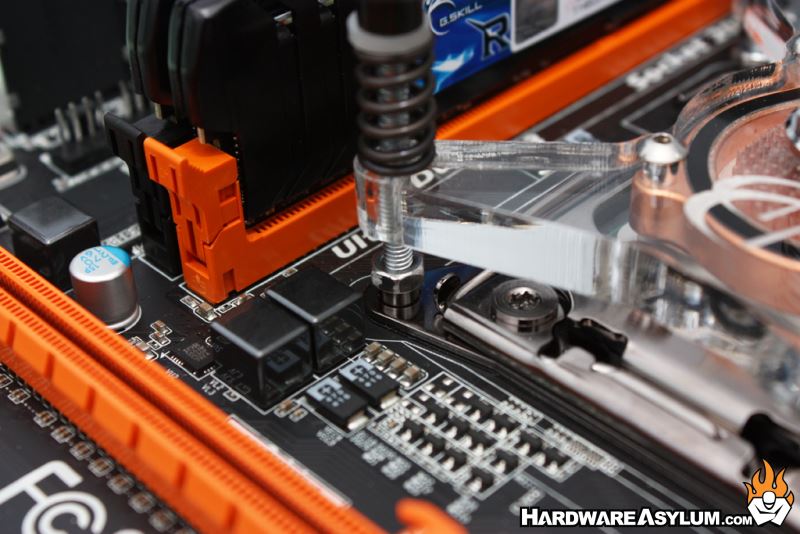
Once all of the screws have been installed you can mount the waterblock using springs and knurled nuts like before.
Conclusion Disclaimer Thing
Keep in mind that the new LGA2011 mounting method is not supported by the PCB meaning that with enough spring pressure you can, and will, bend the mounting plate. Heatsinks and lighter waterblocks, like the TDX, should be ok but use some common sense when you begin to lock things down.
So there you have it, two perfectly good methods for mounting a custom waterblock on the LGA2011. The first will provide you with the best security and strength while the second preserves your warranty and happens to be a cheap and universal method for what most companies are already doing.
So there you have it, two perfectly good methods for mounting a custom waterblock on the LGA2011. The first will provide you with the best security and strength while the second preserves your warranty and happens to be a cheap and universal method for what most companies are already doing.