Noctua NH-U14S 140mm U-Type Tower Heatsink Review
Author: Dennis Garcia
Published: Monday, June 24, 2013
Cooler Installation
Installing any Noctua heatsink is extremely easy and their universal mounting hardware not only is one of the best we have ever seen but works on any Noctua cooler currently on the market. The system is so universal that when new socket configurations come out you can contact Noctua and get a free socket upgrade kit with proof of purchase.
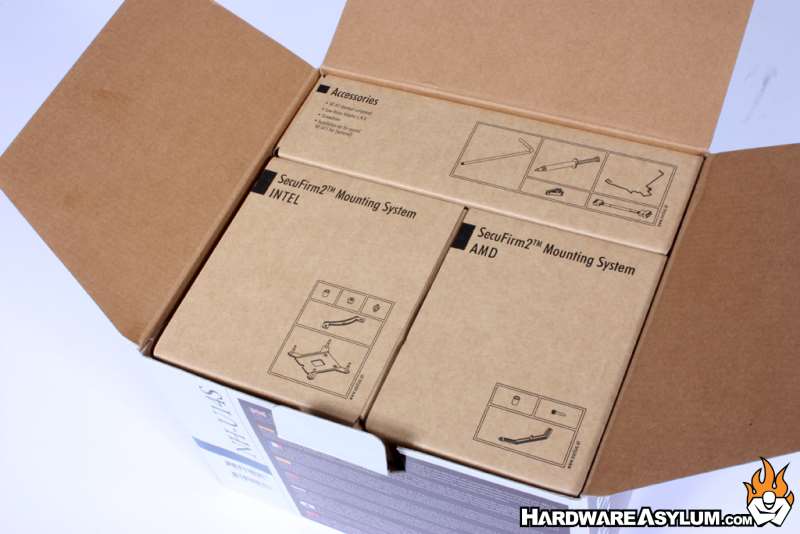
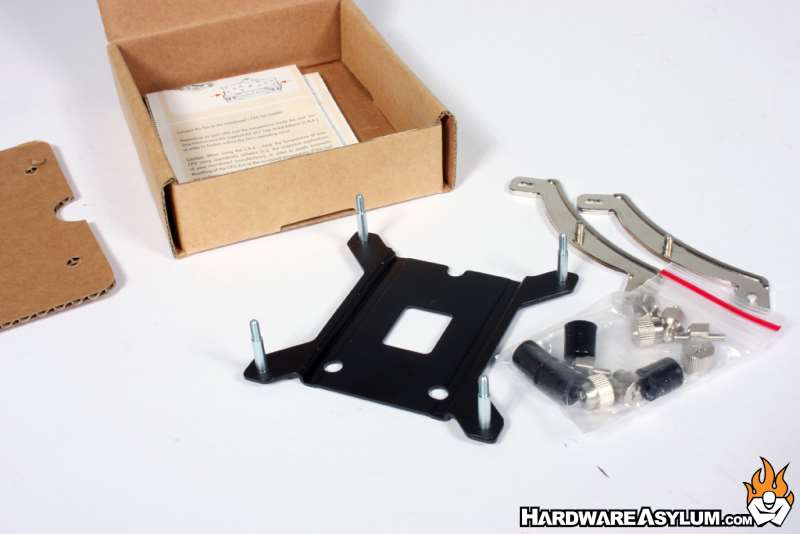
As with any installation you must first start with the included hardware. Each of the boxes shown in this photo contains the hardware you need to install the NH-U14S on any modern motherboard. We'll be using the X79 LGA2011 system for our tests so some of the hardware such as the backplate and spacers will not be used. For specific installation instructions for your platform please consult the included users' guide.
As with any installation you must first start with the included hardware. Each of the boxes shown in this photo contains the hardware you need to install the NH-U14S on any modern motherboard. We'll be using the X79 LGA2011 system for our tests so some of the hardware such as the backplate and spacers will not be used. For specific installation instructions for your platform please consult the included users' guide.
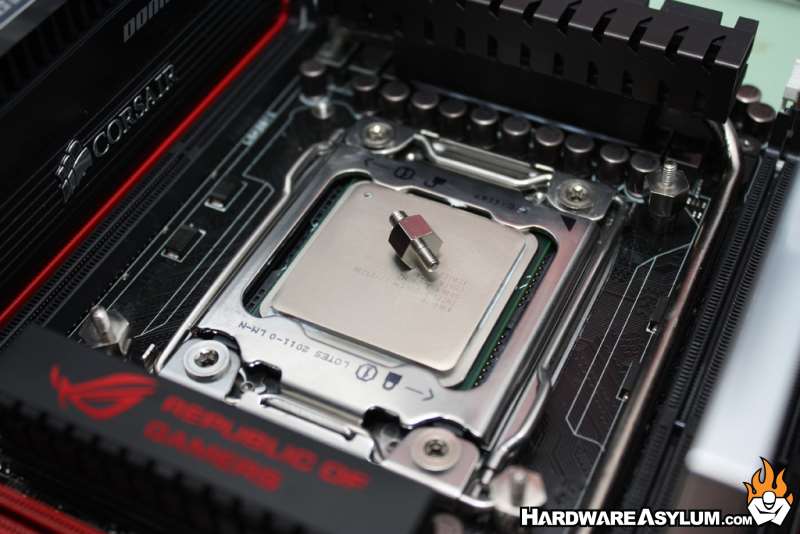
The first step will be to locate the threaded risers and install them into the heatsink mounting holes around the CPU socket. These are 4mm threaded holes so be sure to match up the proper end.
Next you'll install the mounting plates and be sure to place them so they look to be bowing out from the CPU socket. Turning them around will prevent your heastink from installing correctly. Each of the mounting plates is held in place with a thumb nut and secured either with finger pressure or Phillips screwdriver.
Next you'll install the mounting plates and be sure to place them so they look to be bowing out from the CPU socket. Turning them around will prevent your heastink from installing correctly. Each of the mounting plates is held in place with a thumb nut and secured either with finger pressure or Phillips screwdriver.
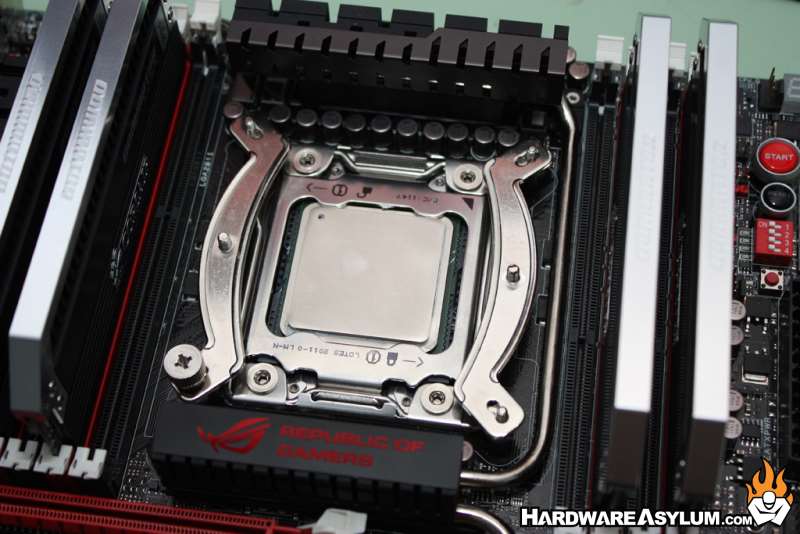
How you install the mounting plates will determine the orientation of your heatsink. Installing them as pictured will have the tower parallel to the long length of the motherboard and memory modules and on X79 this is the only orientation that works.
Once the mounting plates have been installed you can apply some thermal paste and secure the heatsink. We prefer the 5-dot method with dabs in the illustrated configuration.
Once the mounting plates have been installed you can apply some thermal paste and secure the heatsink. We prefer the 5-dot method with dabs in the illustrated configuration.
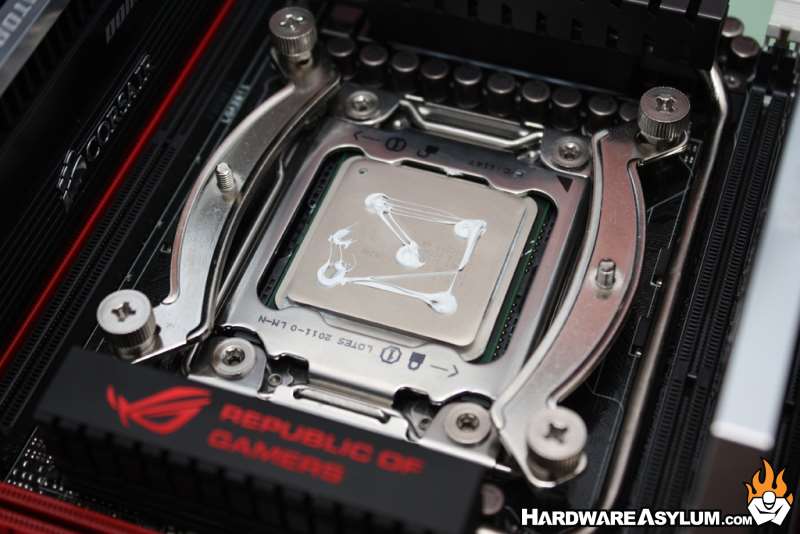
To secure the heatsink line up the mounting screws with the posts on the mounting plates. Loosely tighten each side evenly until the screws stop. When you are done, plug in the fans and you are ready to go.
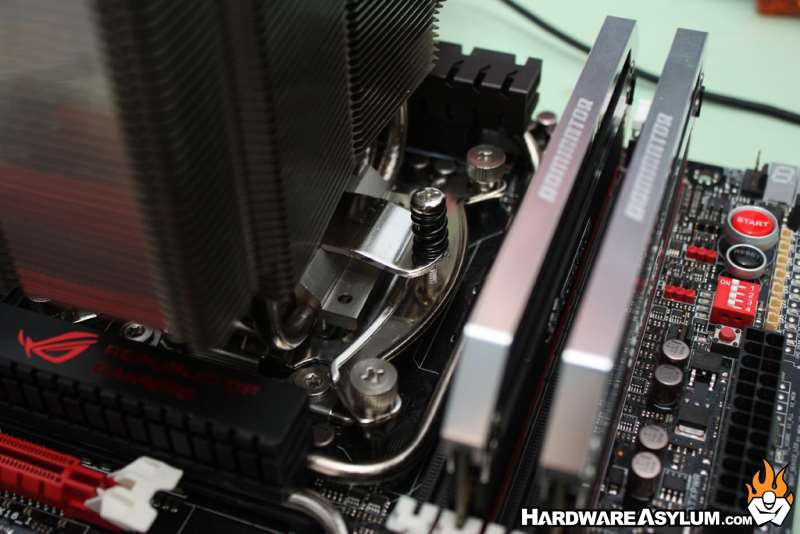
Clearances
As you can see from the following photos the NH-U14S does a great job at clearing the memory slots with plenty of room available to fully populate the memory banks.
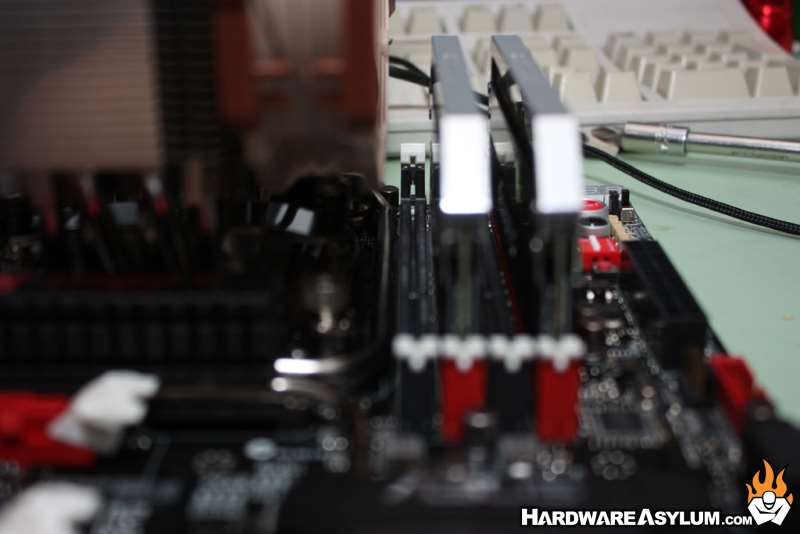
The same cannot be said for our EVGA GTX 770 SC graphics card. Unfortunately Asus placed the topmost expansion slot extremely close to the CPU socket and almost touches the heatsink. Placing a piece of cardboard between the heatsink and video card will prevent any electrical problems. The thing to take away from this is to check for clearances when installing your hardware.