Gigabyte X99 Designare EX Motherboard Review
Author: Dennis GarciaBenchmarks - Overclocked
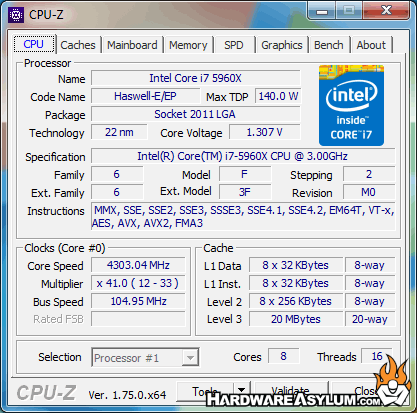
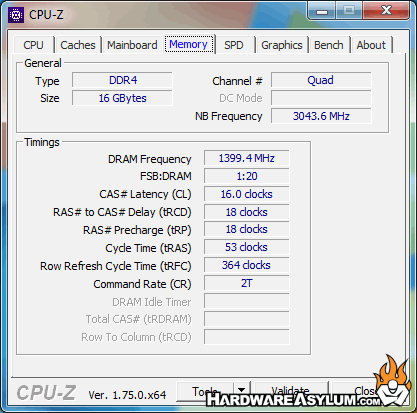
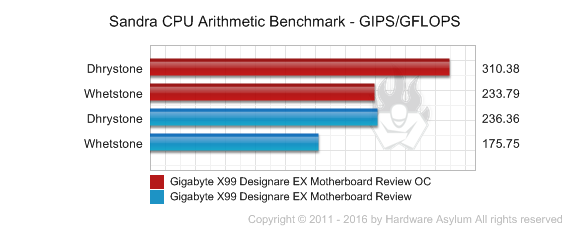
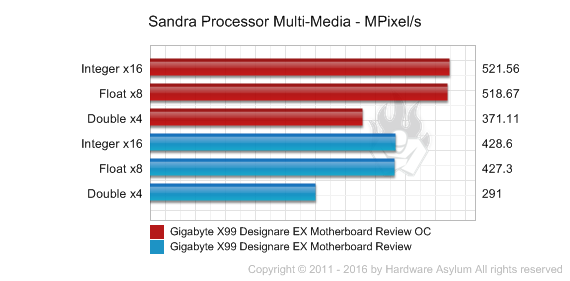
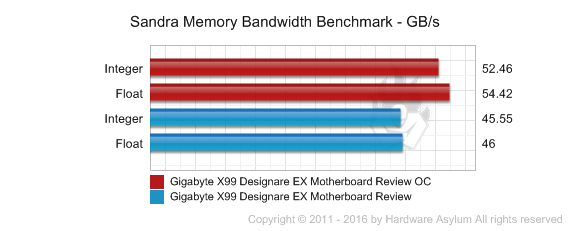
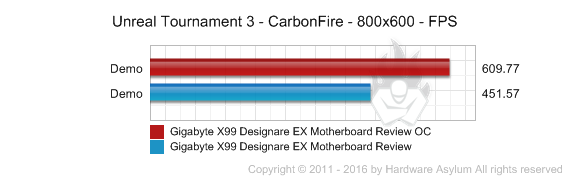
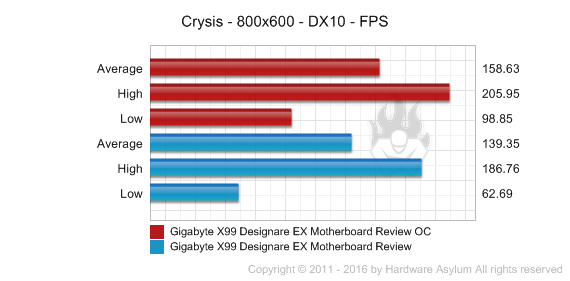
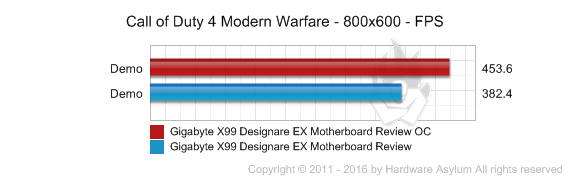
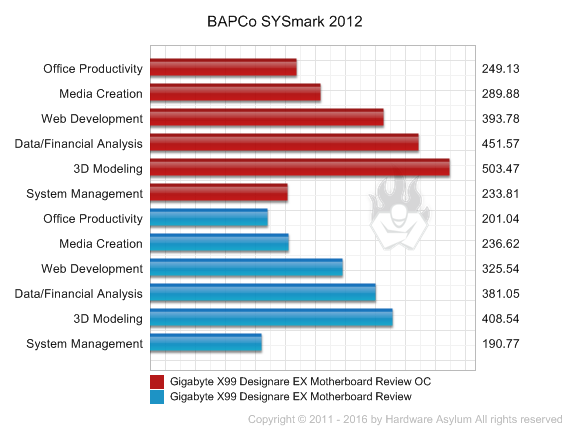
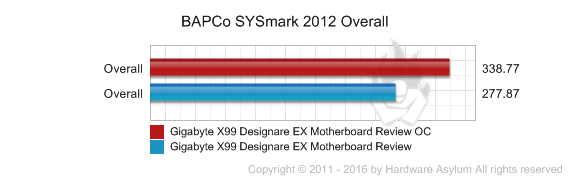
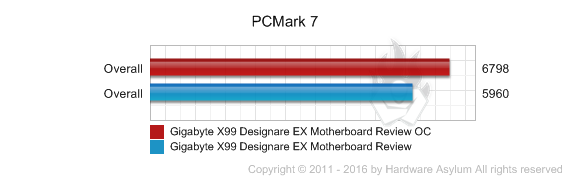
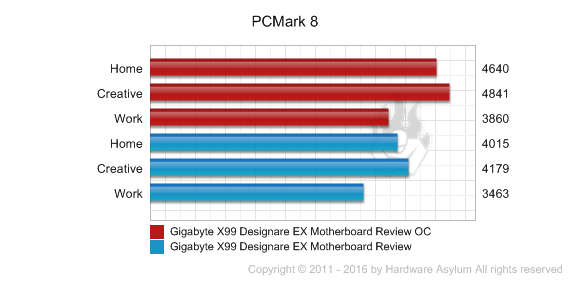
As with all of our reviews, we pit the default speed system against the overclocked one in a head-to-head byte match. The effective overclock for these tests is 4.3Ghz @ 41x multiplier and 105Mhz BCLK. The BCLK bump increased both the XMP and Memory controller frequency which can have a profound impact on CPU processing power. CPU core voltage was bumped to 1.3v and everything ran without issue.
Funny story, I don't normally run SYSMark in my overclocking tests because it takes over 2 hours to complete. As it would turn out I ran the newer SYSMark 2014 first and then had to wipe the drives so I could run SYSMark 2012 and forgot to downclock the system.
If that isn't a call to the X99 Designare-EX system stability I'm not sure what is.
Overclocking the Haswell-E is a lot like overclocking a standard Haswell. All of the same controls are available and they all do what you would expect. There are a few notable differences and all seem to be related to heat. Given that the TDP is 140w you’re going to need a cooler that will dissipate 250+ Watts if you want to maintain decent temps.
To maximize system performance you have a couple options. The first is straight multiplier overclocking like I did for these tests and the results are quite good. To extract a little more you will want to start experimenting with BCLK adjustments that will tweak your memory frequency and also increase the memory controller frequency.
While doing this will really increase memory bandwidth and system performance if you are a gamer it may not be all that noticeable in modern DX11 and DX12 games. For these situations I would recommend investing in a high speed memory kit (3000Mhz+), set the XMP profile and give your CPU a multiplier adjustment until it starts to require more Core voltage. Back it down 1x and begin your stability testing. Leave the turbo feature enabled so to limit excess heat and enjoy.