MSI X99A Godlike Gaming Motherboard Review
Author: Dennis GarciaBoard Layout and Features Continued
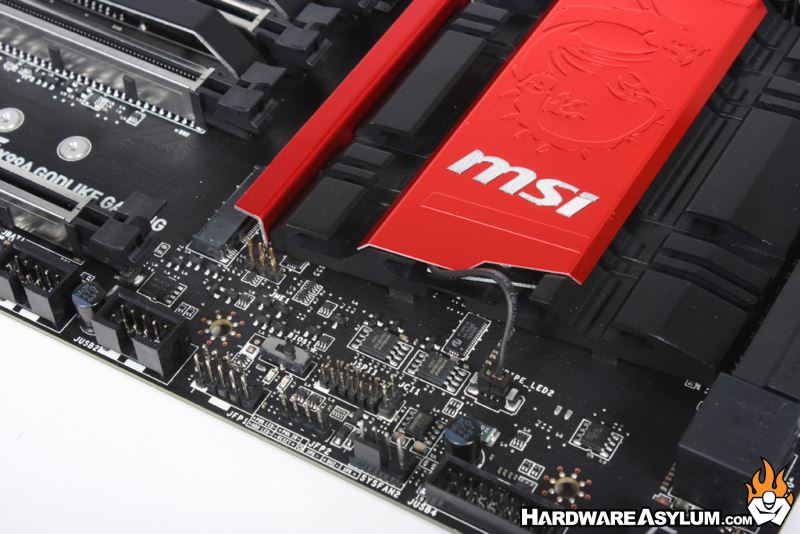
Internal SATA connections number ten and follow the new SATA6 connection standard. Two of the ten available ports are dedicated to SATA Express which is the large block located in the center.


To compliment the new SATA Express connection you also get an internal Turbo M.2 socket for ultra compact SSDs with direct access to the PCI Express bus. These can deliver up to 32GB/s of bandwidth and are low profile enough to fit anywhere. The M.2 is located towards the bottom of the motherboard near the last PCI Express slots and will accept both short and long boards without modification.
Even with the powerful UEFI BIOS there is still a basic need to have a few things accessible at the hardware level. The X99A Godlike comes with a short list of hardware based switches starting with the benchtop controls for power, reset and OC Genie. Nearby is a small switch to control the OC Genie mode which will basically increase the overclocking level. In front of the benchtop buttons are the voltage checkpoints which can be helpful in certain overclocking situations.
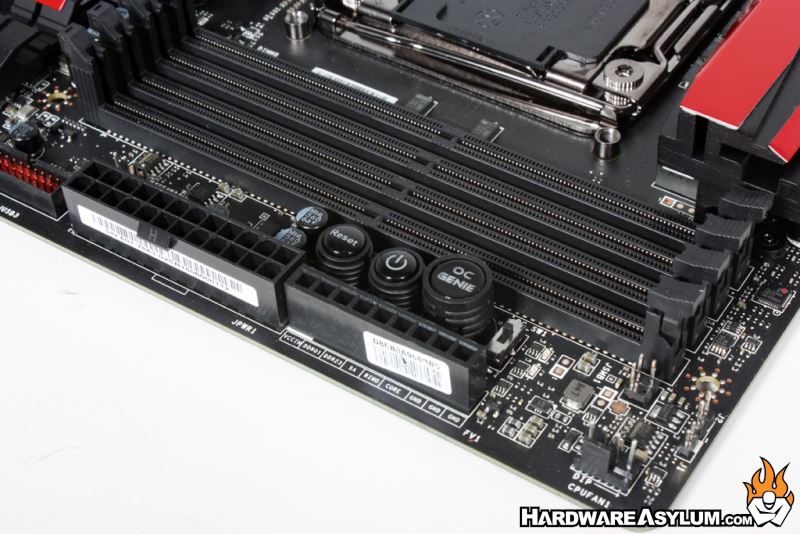
The MSI Godlike also comes with a dual BIOS feature allowing you to flash different version of the system BIOS to different chips. This feature is controlled by the a small switch near the chips and needs to be set before flashing the new image.
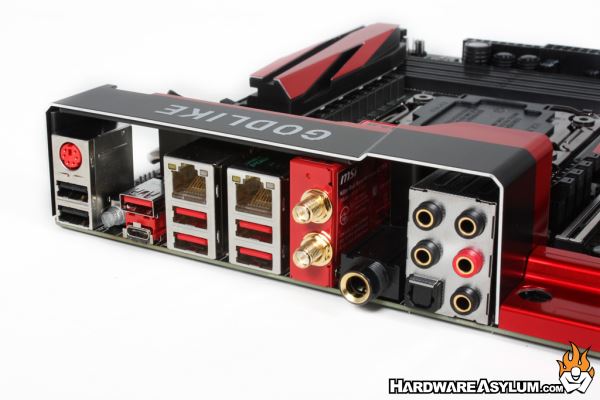
The I/O panel is really quite special and looks somewhat empty but, for good reason. Staring at the left you will find an old style PS/2 connector for keyboard and mouse followed by two USB 2.0 connectors for low speed devices. Next to that is a CMOS reset button and two USB 3.1 Gen 2 ports including a single Type C connector. Next to that you will find two Killer E2400 Ethernet keystones sitting atop four USB 3.1 ports. Gold plated analog audio jacks compliment the 8 channel audio offering with digital connections over optical. You will also notice a 6.3 audio jack is obviously for a high-end set of headphones and needs to be enabled using a hardware switch onboard.