Isobaric Subwoofer Enclosure Build
Author: Dennis GarciaIntroduction
When choosing a sound system for your PC it is important to consider the frequency response of your sound solution. If you are lacking in any of those areas it can make or break your audio enjoyment. Of course, there are high-end sound solutions that offer amazing performance and, generally speaking the more you spend the higher the audio quality will be.
However, speakers are very predictable when it comes to sound reproduction and while a speaker (driver) can be marketed as “full range” there are trade offs when it comes to sound quality. Certain frequencies will be amplified while others might sound muffled or absent.
You can easily tell the difference provided that you know what you are listening for.
In this project I am on the hunt to find a way to make my Retro PC projects sound better and I am starting by adding a little boom to the existing sound solution. The overall project will become a multi part series as I experiment with different box designs and find out what configuration will be best while still offering a nice desktop experience.
The first box in the series is an Isobaric subwoofer design that has been built around two Tang Band 5.25” Subwoofers powered by a Lepai plate amplifier. This system is rather low powered with only 60w being available to drive the subwoofers. Because of this it will be important to make sure the box design is efficient while also working well for its intended purpose.
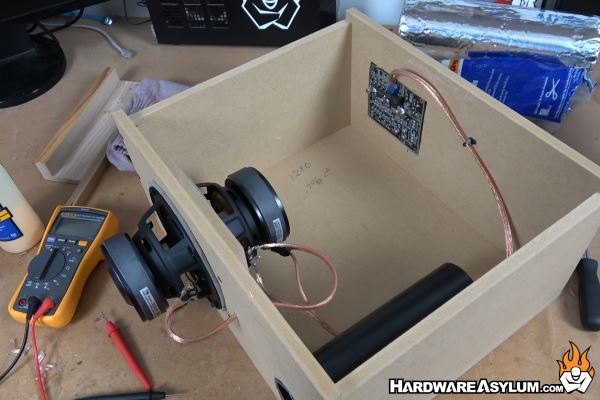
An isobaric subwoofer enclosure is different from a traditional single driver design with the intention of making the speakers act like they are in a much larger enclosure. The size of the box will determine a resonate frequency, generally speaking larger boxes offer deeper bass while smaller ones will operate best in higher frequencies. By coupling two drivers together with a small air chamber between them you effectively double the mass of the cone, increase power handling and should be able to hit lower frequencies than you would with a single driver.
In this video I go over the construction and theory behind an isobaric subwoofer enclosure and do some rather in-depth testing to determine if isobaric loading is still effective and how good the actual base response is.
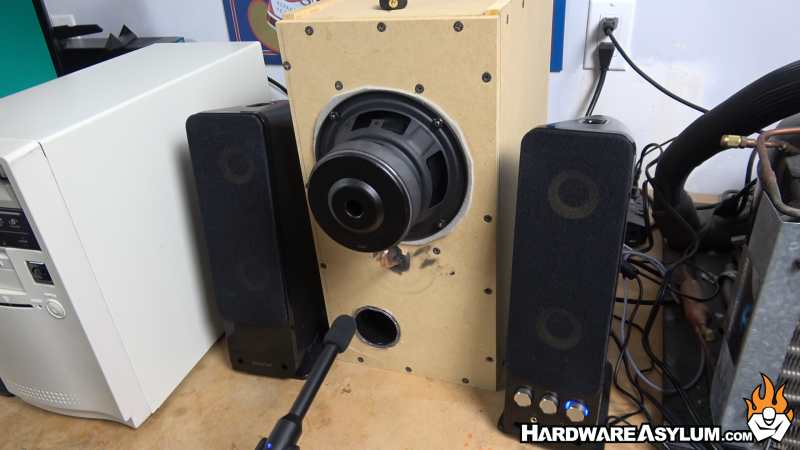
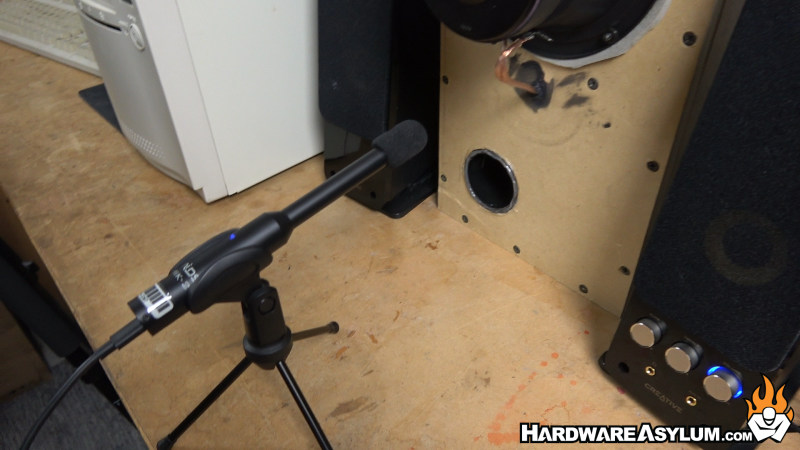
A miniDSP UMIK-2 measurement microphone is used to take frequency response measurements and the Room Equalization Wizard software is used to record and compare the various tests. GL Quake on my Retro Pentium PC is used as a sound quality demo and with quality speakers or headphones you can easily tell the difference a subwoofer can make in overall sound reproduction.
The UMIK-2 is also an excellent microphone for capturing music and bass tracks so if you cannot hear the intro and outro music you need better bass in your life.
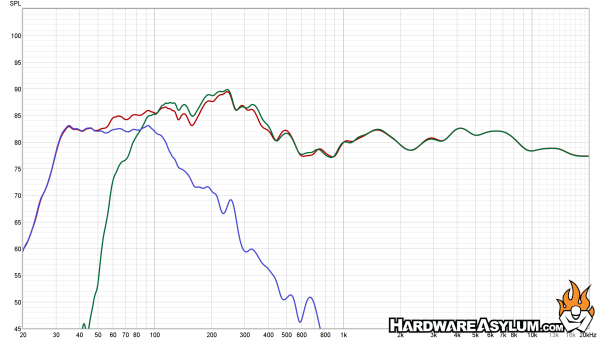
In the above chart the blue line is the subwoofer response curve and it is very flat across the frequency range. The Green line is the Creative desktop speakers I picked for my retro build. As you can see the Creative speakers do not hit very low and are missing a huge section of sub-bass frequencies. The Red line is what happens when I pair the Creative speakers with the subwoofer including a huge boost in the low range where the two curves intersect.