Overclocking the EVGA GTX 980 Classified with LN2
Author: Dennis GarciaLN2 Overclocking Step 1: Preparation
It is time to roll up our sleeves and get to work. Overclocking with LN2 involves three major things. The first is a device we will use to cool the GPU called an evaporator or could be called a GPU Pot or GPU container. It is basically a chunk of copper that we make cold using the phase change of LN2 from liquid to gas. Next is protection from condensation. Most overclockers call this the insulation however there is very little we are insulating and as you will see later in the article even with neoprene insulation the surface will drop below 0 and start to frost. Knowing this we need to take steps to protect the electrical components from the water when the frost melts. The last item is temperature control in the form of a K type thermocouple and making sure the hot components stay cool and at the temperature we want.
And while it may be difficult to believe when you overclock with LN2 part of the card can be -50c while the other part might be at +40c. You will see this later.
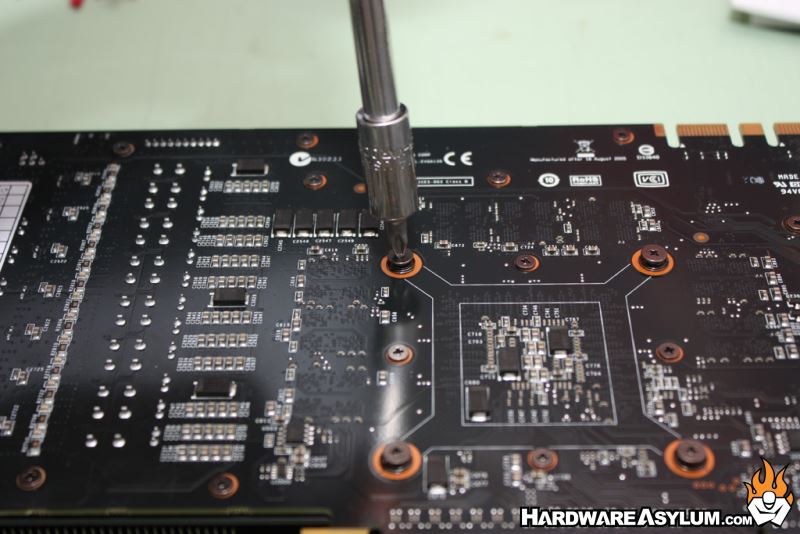
As you can image all of the stock components need to come off the card. On the 980 Classified there are four screws holding the heatsink on and two fan headers. Remove these and set the heatsink aside. At this time take a Q-tip and some rubbing alcohol and carefully clean the GPU of any thermal paste.
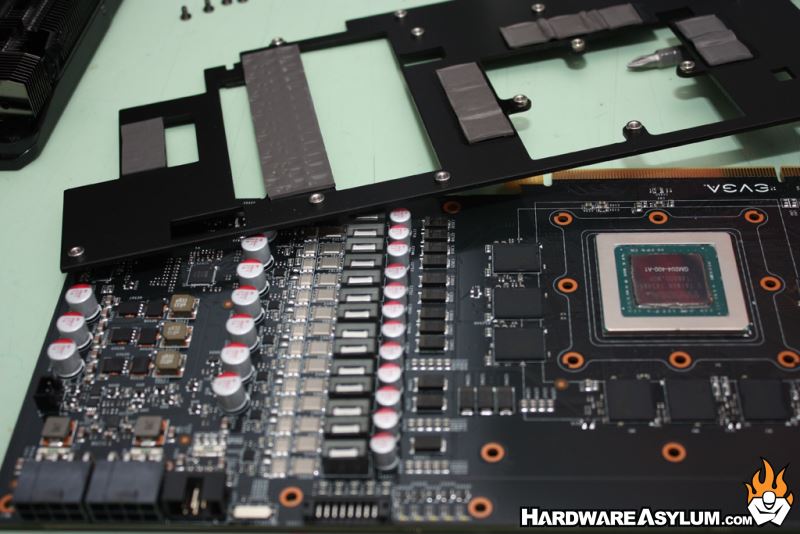
Next remove the heat spreader and set it aside. Be extremely careful not to lose the thermal pads you will need them to reassemble the card.
For video cards I like to use a combination of liquid electrical tape and kneaded eraser. The liquid tape is applied to the back of the video card and serves as a airtight barrier between water and electronics. It also is removable which is a nice bonus for when you are done overclocking.
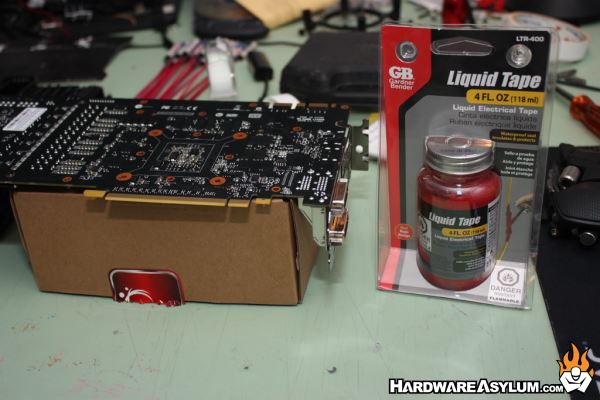
Follow the instructions on the bottle. There is an applicator brush in the cap and spread on several thin layers and let it dry between coats. A single layer is unusually enough however you cannot remove it unless you have at least 4 coats.
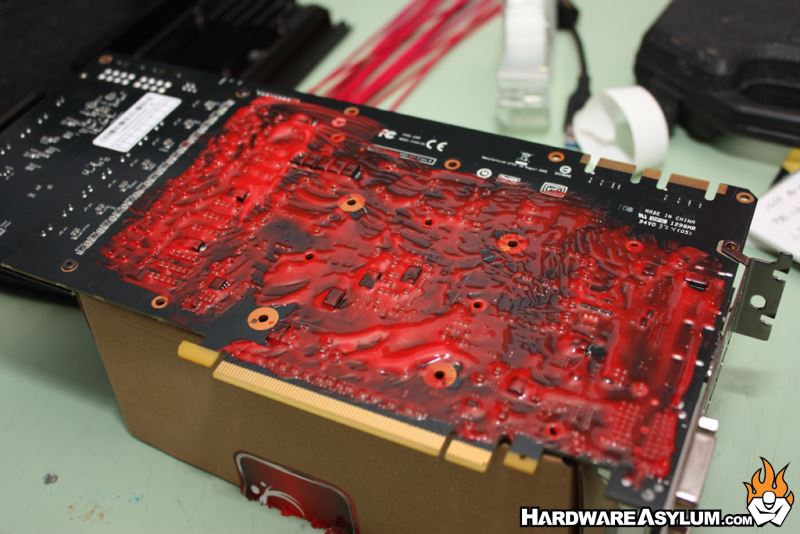
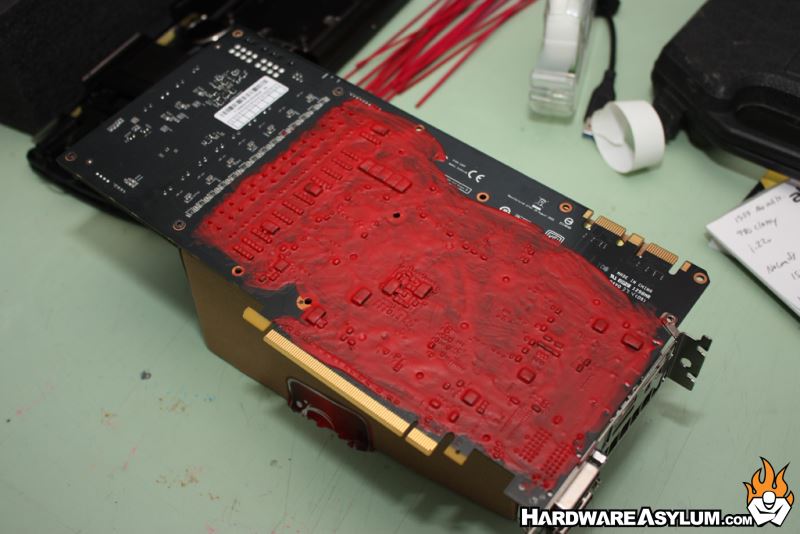
On the left is a partially dried first coat and the left is after three. I applied a fourth to some of the areas around the capacitors to make sure there were no holes. Also notice that I didn’t cover the entire card. The area to the left of the GPU is the VRM section and it will never drop below 0 so there is no need to insulate. Likewise the SLI fingers need to be exposed if you are doing multi card. I run the liquid tape as close as I can to the PCI Express connector as this is a prime location for pooling water.
Once the liquid tape has fully cured you can flip the card over and begin the next step. I like using kneaded eraser on this side of the card for a couple of reasons. First the rubber eraser provides a little heat insulation for the memory chips (they generate their own heat) and second it is easier to apply around the GPU socket and have it match up with the neoprene on the GPU pot.
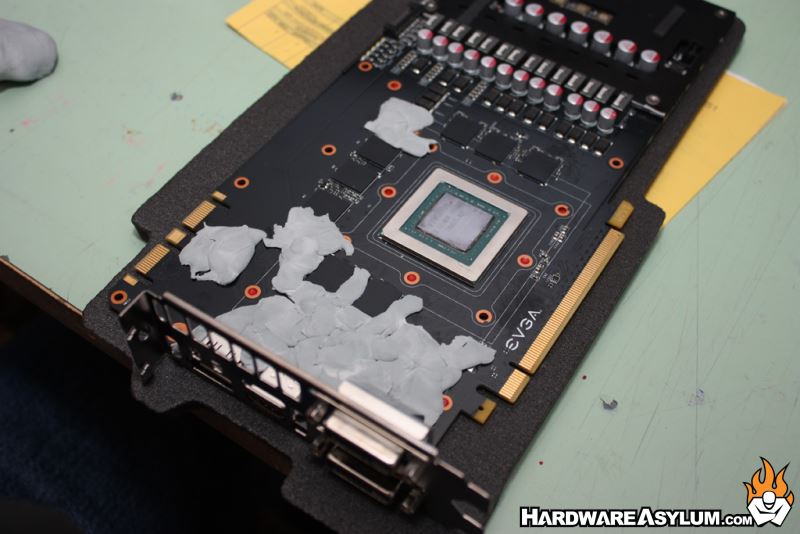
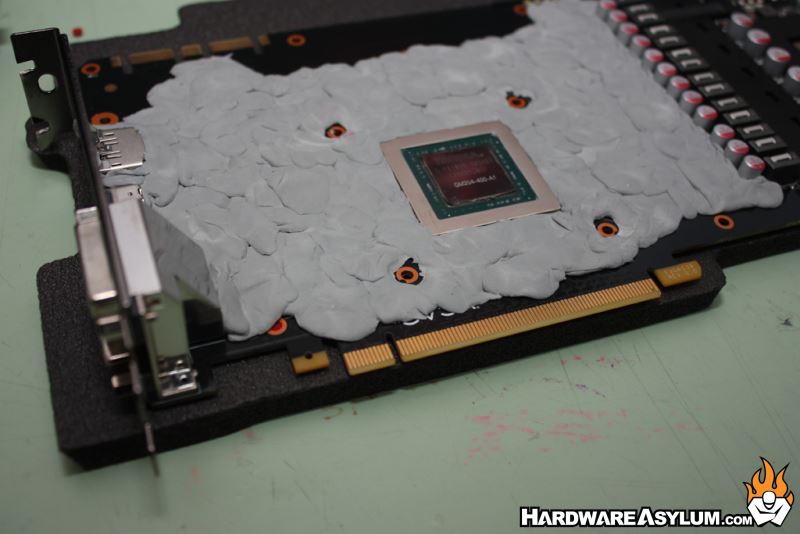
The trick with kneaded eraser is to pull it apart and knead it in your hands to warm it up. It will become quite pliable and easy to work with that way. Then take small nickel sized chunks and flatten them between your fingers and then flatten them even more on the PCB. Slowly fill the voids between the memory chips and around the GPU then go over the card again to make sure everything is covered.
Like with the liquid tape there is no need to cover the VRM and just make sure you have an even uniform surface over all of the components.