Building the Final Version of the Double Subwoofer Box - Part 1
Author: Dennis GarciaIntroduction
Towards the end of 2022 I was experimenting with building box enclosures for two Tang Band 5.25” Subwoofers. The intention was to build an exceptional sound system for use with Retro Computers but to also be flexible enough for use on modern PCs and/or even a Home Theater.
As a recovering BassHead I will be the first to tell you that building the perfect bass is not easy. It is a delicate balance between your hardware. This includes the physical drivers (speakers), amplifier and enclosure. Maybe 40% of the total effort will come down to the subwoofer enclosure and how well it is matched to the rest of the system. If the enclosure is too big then your bass will be sloppy with poor power handling. If the box is too small you will miss out on accuracy while needing to digitally adjust frequencies to help level the curve. Choosing an amplifier is similar to choosing a video card where you could easily over or under spec if the system is not balanced.
Enclosure design is something I explored in my previous YouTube videos and supporting articles and you’ll find links to these below. I’d urge you to check them out and let me know if you think I missed anything.
In this article I’ll be discussing the Part 1 video for the Double Sub Subwoofer project where I focus on building the final enclosure while adding some much-needed finishing details. These details were absent from the prototype build in the interest of time and given that the design has been finalized there is no reason to leave them out.
The first update was to swap out the front and bottom panels for 3/4” MDF while the remainder of the box will remain 1/2” MDF. MDF is an extremely dense engineered wood panel (Commonly called Medium Density Fiberboard) that works extremely well at building all sorts of things from kitchen cabinets to trim panels in your home and speaker enclosures. It is easy to cut and shape and you only need simple tools to assemble. The important aspect for speaker builds is the low resonance coefficient which helps with overall audio performance.
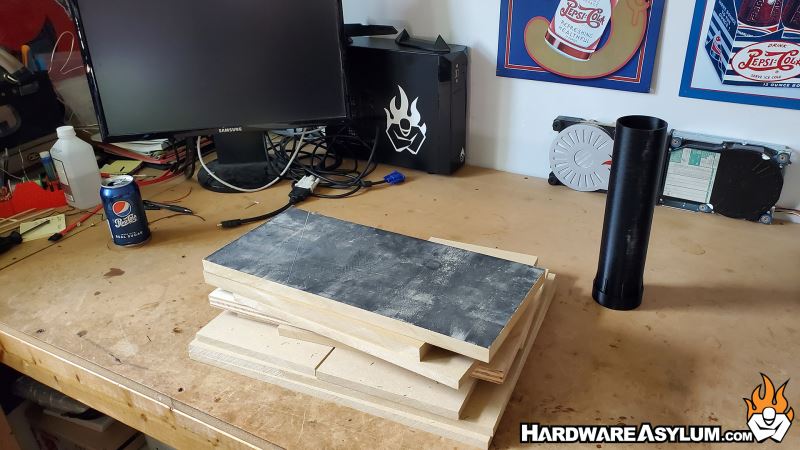
Like before I’m using Titebond Glue to seal the edges and drywall screws to hold everything together. The screws have been countersunk with the holes were filled with Bondo plastic body filler.
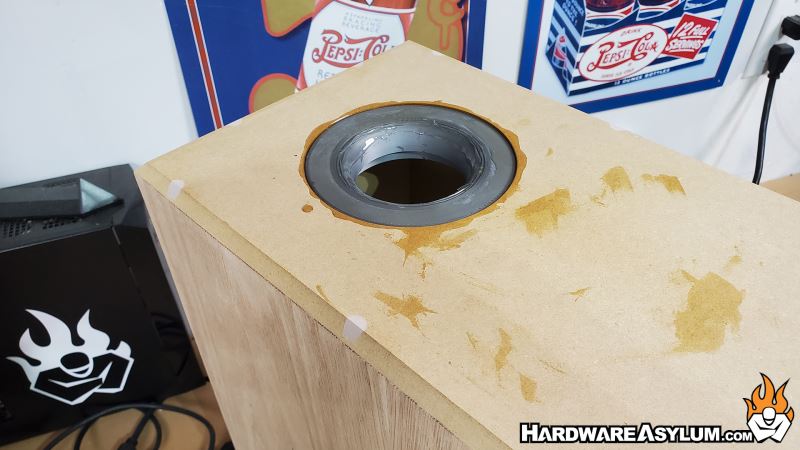
I’ll be cutting in a 45-degree chamfer around the front panel and counter sinking the port and subwoofers using a rabbiting bit. The holes were established using a holesaw giving everything a super clean look.
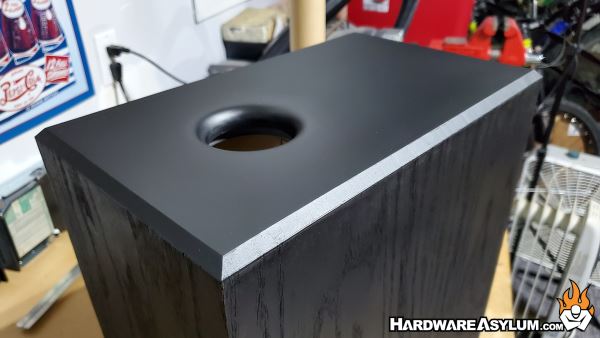
Three sides of the box were then covered in oak wood veneer that was then stained black for an extremely dark and yet highly textured appearance. The front panel was smoothed using body filler and then primed and painted with flat black paint.
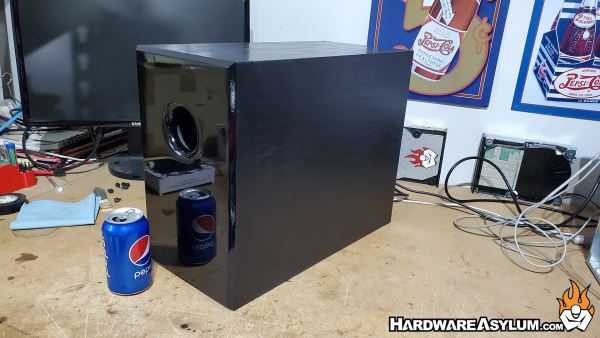
The entire box was then covered in automotive clear.
I will admit that using an automotive clear was a bit of an overkill and the high gloss shine over the wood panels seemed a little out of place. While this is not in the video I have since sanded back the clearcoat, reapplied the colors and treaded the wood panels with a satin clearcoat while the front panel was treated with a high gloss black paint. The finish won’t be as durable as before but, has finally attained that refined look I was after.
In the next video I will be installing the subwoofers and wiring up the Parts Express Class D amplifier. This is one of the unknowns between the Protype box and this final design since the amp is now 30% more powerful.