My Retrobright Process for converting yellowed ABS
Author: Dennis GarciaIntroduction
One of the defining characteristics of vintage computers is the “beige” box. This was a rather neutral color for the time period and allowed other hardware vendors a sudo color standard to follow when offering up their accessories. The vintage colors consisted of a beige, a light grey and black which eventually transmuted to a standard bright white and black as a way to combat one of the biggest issues with vintage retro PC ABS plastic.
It turns yellow with age.
Based on my research there are a number of accepted theories as to why the plastic changes color and at the heart of is a fire retardant chemical that was added to the plastic. It tends to react with oxygen and will change the color of the plastic.
For the chemical reaction to take place you need heat to be present. Some will say that UV light is also a component but, you can get yellowed plastic in the absence of UV light which would indicate that heat is the primary driver and, if you think about if you leave something out in the sun or near a window it is going to heat up.
Ironically enough, the yellowing can be reversed using Hydrogen Peroxide and Heat. Again, some articles state that you need to use UV light to activate the chemical reaction but, in my research and experience you can get the process started with just heat and adding the UV tends to help accelerate the process.
I might set out to do a more scientific experiment to confirm my findings but, there are already plenty of those online so, if you would like to see my methods tested out then leave a comment or drop me an email.
To retrobright the bezel found on the Classic case project I first needed to remove everything from the plastic including the switches, lights, and plastic dashboard cover. They then need to be cleaned of dirt and grease as any of this left behind can cause the plastic to have white patches from a hydrogen peroxide chemical burn.
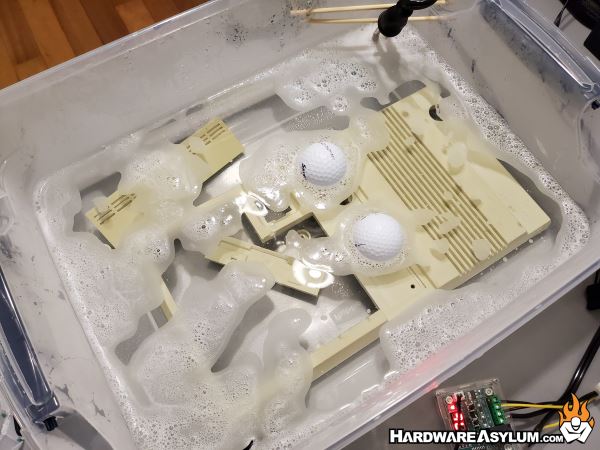
I then put all of the plastic parts into a clear plastic tub and submerge everything in a H202 solution comprised of a 40 volume clear developer. This works out to be about 12% hydrogen peroxide along with alcohol water and some other chemical, mostly to keep the solution wet when using it to bleach hair.
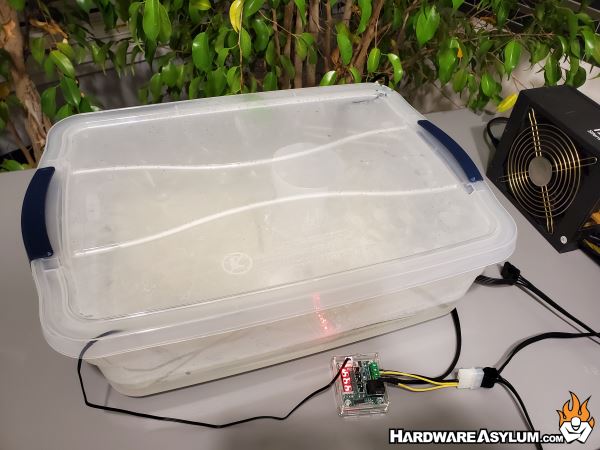
For heat I’m using a 12v beverage heater that is hooked into a thermal relay that I have wired into a single 4-pin molex power plug. I’m using a 1200w Cooler Master power supply to provide the power and have the thermal relay set to 50c.
I then cover the tub. This was mostly to prevent the developer from evaporating but also holds the heat in making the system more efficient.
While I believe it isn’t needed, I also build a UV LED panel and wired the strips in parallel to ensure that they all got an equal amount of power and remained a bright as possible. This panel was attached to a cardboard stand that will position the lights directly over the Retrobright tub.
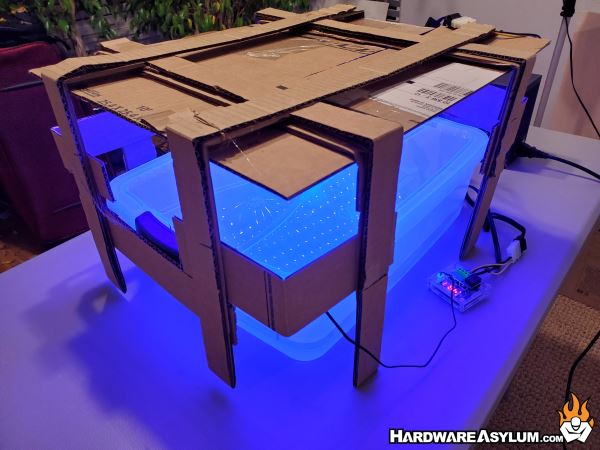
Another 4-pin molex plug was used so I can power it from the same PSU and unplug it if needed. I didn’t bother with fully enclosing the tub with UV LEDs and there is some question as to if the clear plastic tub will block UV light. I did find that the golf balls I used to hold the parts under the solution do react to the UV so, it would seem that some light is getting through.
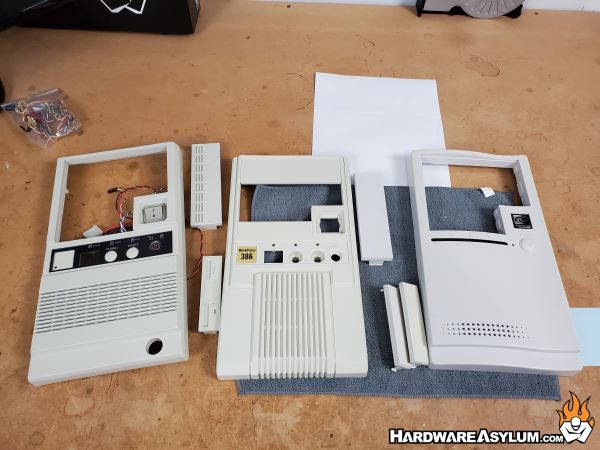
The bezel from both the Classic Case and Scam Case were both in the solution for a total of 4 hours and allowed the part to fully revert back to its natural color. I’m not sure how long these parts will remain this color but, I did apply some Meguiar's Mirror Glaze 40 to the finished bezel to give the plastic some shine, and fill up the plastic pores and proved a little protection.
Like before, please check out the video and consider subscribing if you like my content and want to see more.