Cooler Master Cosmos II Ultra Tower Case Review
Author: Dennis Garcia
Published: Tuesday, January 03, 2012
Case Cooling
The single biggest issue with cases is making sure there is adequate cooling available for the intended system. Small cases tend to have the hardest time with this while the larger towers usually take cooling to the extreme.
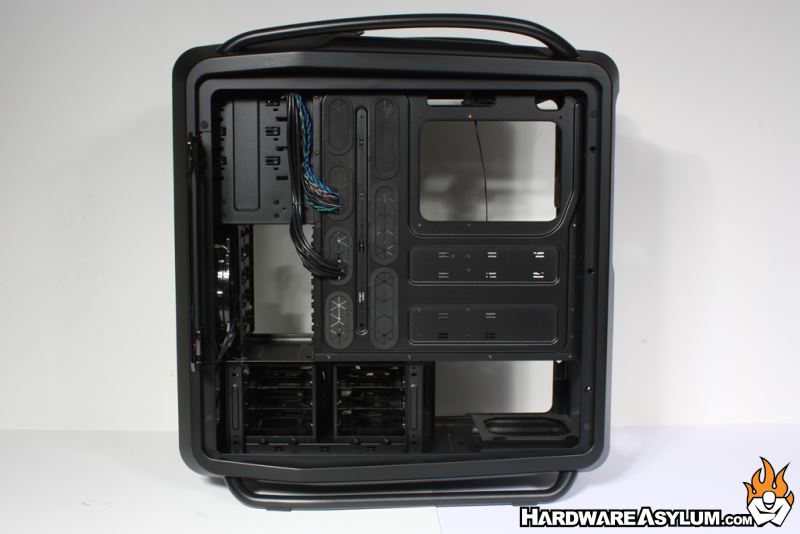
You will find two distinct cooling zones in the Cosmos II Ultra Tower, one around the motherboard and another at the bottom of the case with the PSU. While the zones aren't sealed to prevent air transfer the metal plate below the motherboard tray does separate the two sections and makes for an interesting cooling scenario.
You will find two distinct cooling zones in the Cosmos II Ultra Tower, one around the motherboard and another at the bottom of the case with the PSU. While the zones aren't sealed to prevent air transfer the metal plate below the motherboard tray does separate the two sections and makes for an interesting cooling scenario.
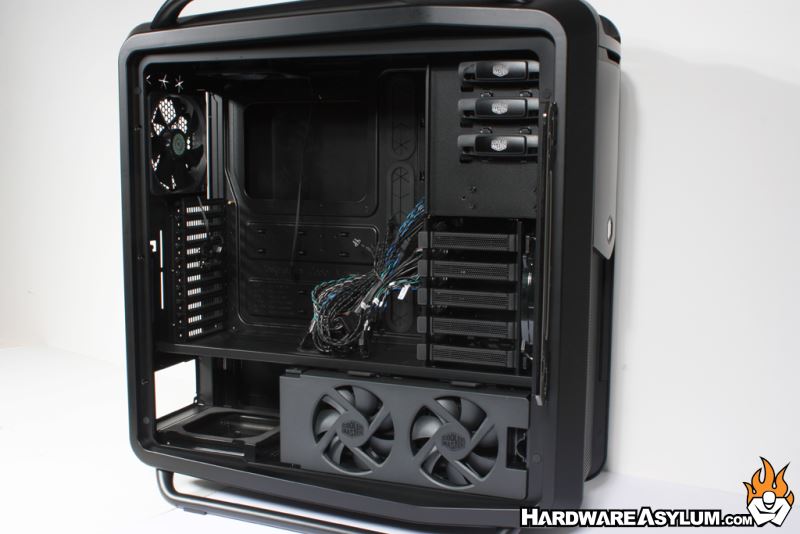
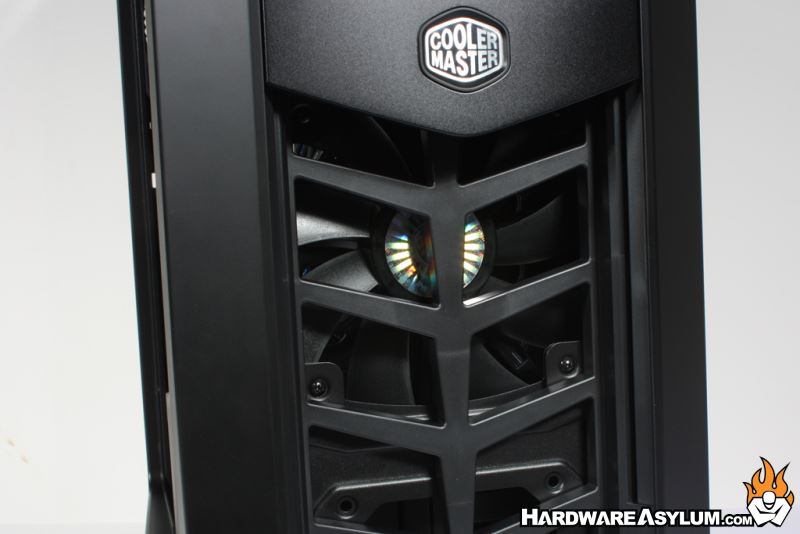
There are a total of five fans that come with a stock Cosmos II, a 140mm in the traditional location, two 120mm in the lower zone blowing over the HDD rack, a lighted 200mm fan at the front of the case and a single 120mm fan at the top. All of the fan positions are convertible and will accept larger, and smaller, fan sizes.
The front fan is located behind a mesh grill and attached to the front bezel. Sadly since the bezel is not removable to remove this fan you must first remove the four exposed screws and slide it out from behind. This fan is also covered when the external drive bay door is down but not blocked due to how the front bezel is constructed.
The front fan is located behind a mesh grill and attached to the front bezel. Sadly since the bezel is not removable to remove this fan you must first remove the four exposed screws and slide it out from behind. This fan is also covered when the external drive bay door is down but not blocked due to how the front bezel is constructed.
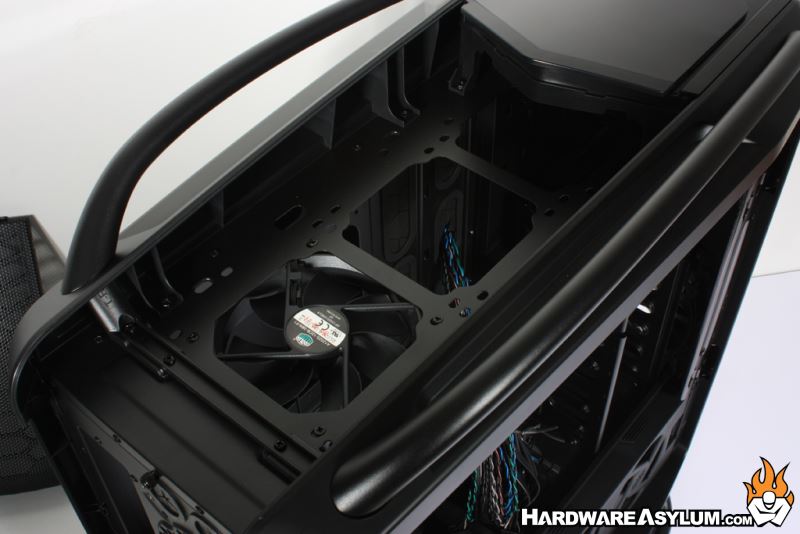
At the top of the case you will find locations for three 120mm fans and proper spacing for a triple fan radiator. The case manual suggests that you mount the fans to the top of the panel with the radiator located inside. This will properly vent the case and cool the radiator at the same time.
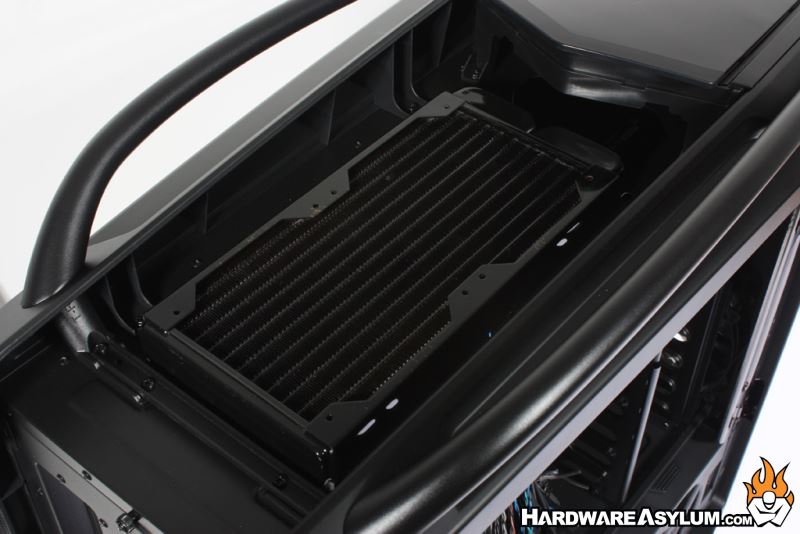
We have a dual fan radiator pictured here just to show how much room is available. The top fan locations can also be converted to support two 140mm fans or a single 200mm fan if you prefer aircooling over the trials and tribulations of using water.
We have a dual fan radiator pictured here just to show how much room is available. The top fan locations can also be converted to support two 140mm fans or a single 200mm fan if you prefer aircooling over the trials and tribulations of using water.
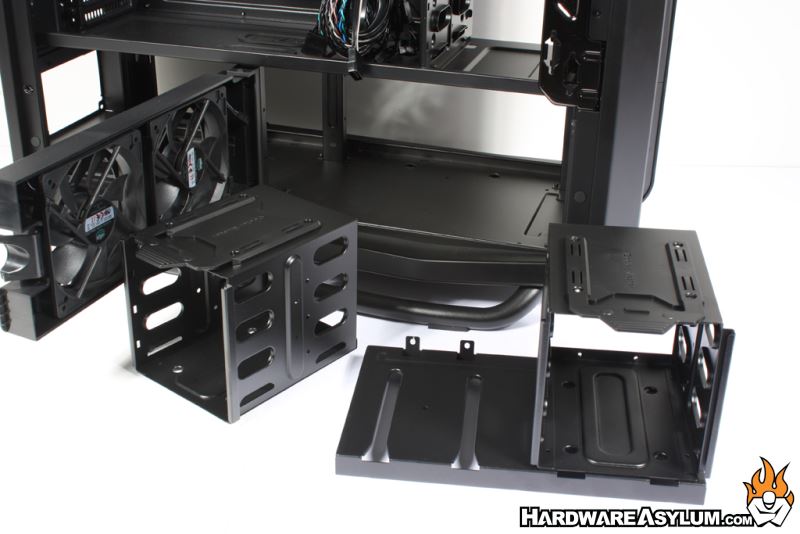
Maybe one of the most unique features of the Cosmos II is the conversion of the lower HDD rack to support watercooling. In most of our case reviews we discuss different watercooling options and mention where different components can be installed and if any modifications will need to be made. For this case Cooler Master has taken out the guess work.
The lower HDD rack is completely removable leaving you room to install your own cooling gear and take advantage of the cross flow cooling zone. To help sweeten the deal Cooler Master has included the rails you will need to properly mount a dual fan radiator in this section. Simply attach the rails, install the radiator assembly and run your hoses. You can even control the fans with the built in fan controller.
The lower HDD rack is completely removable leaving you room to install your own cooling gear and take advantage of the cross flow cooling zone. To help sweeten the deal Cooler Master has included the rails you will need to properly mount a dual fan radiator in this section. Simply attach the rails, install the radiator assembly and run your hoses. You can even control the fans with the built in fan controller.