Asus P9X79 Motherboard Review
Author: Dennis Garcia
Published: Thursday, March 08, 2012
Board Layout and Features Cont.
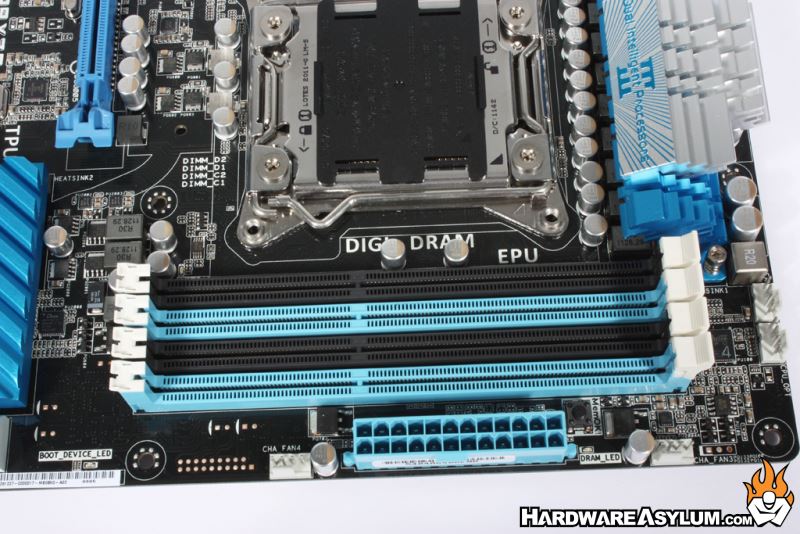
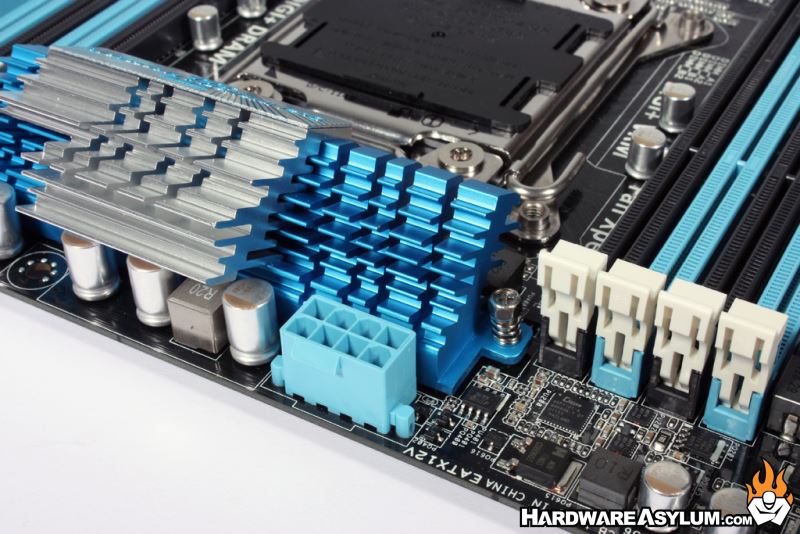
Standard 8 pin 12v power is required to run any Sandy Bridge E system and you'll find the power socket up near the PWM coolers.
There are no obvious voltage test points on the ASUS P9X79 so you'll have to rely on software monitoring for voltage and temperature.
You won't find any fancy bench top buttons on the P9X79 either, instead you get a standard front panel connector, fancy green power LED and variety of internal USB and COM headers. In the background you'll see two mini switches which are the manual way to set EPU and TPU. We say manual because you can also configure them using the UEFI or thru the Ai Suite software package.
You won't find any fancy bench top buttons on the P9X79 either, instead you get a standard front panel connector, fancy green power LED and variety of internal USB and COM headers. In the background you'll see two mini switches which are the manual way to set EPU and TPU. We say manual because you can also configure them using the UEFI or thru the Ai Suite software package.
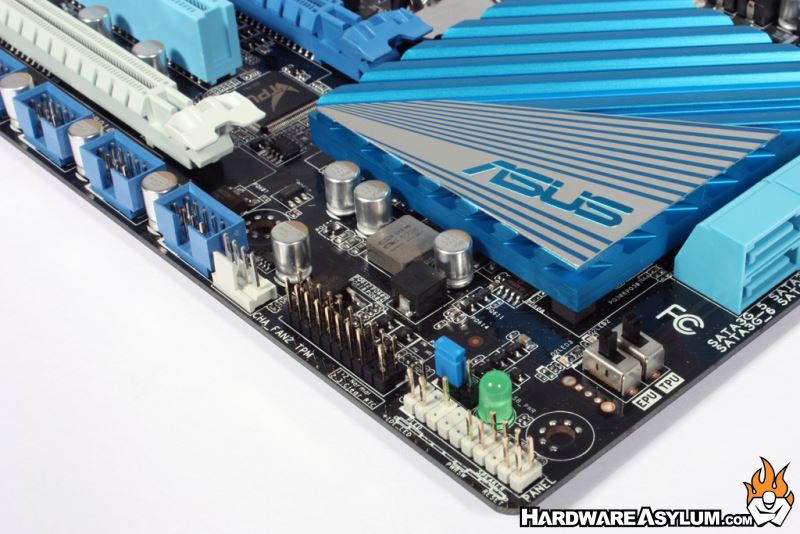
Internal headers are located across the bottom of the motherboard and include four USB, TPM, Serial and front panel audio. The TPM is nice for those of you looking to add a little security to your system using hardware based encryption.
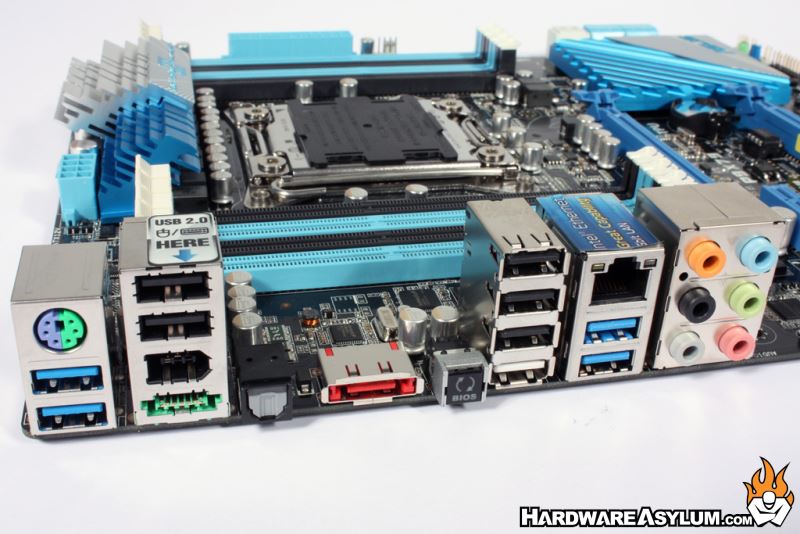
The I/O panel is a little unique but does feature many of the standard things we have come to expect. You'll find a combined PS/2 keyboard and mouse port over two blue USB 3.0 ports, next to that you'll find two USB 2.0 ports for keyboard and mouse over a single IEEE 1394 and powered eSATA 6 connection. Optical audio and the normal analog audio connection are present including the single Intel LAN port, unpowered eSATA and BIOS flashback feature allowing you to easily flash the system BIOS from the I/O panel.
The I/O panel is a little unique but does feature many of the standard things we have come to expect. You'll find a combined PS/2 keyboard and mouse port over two blue USB 3.0 ports, next to that you'll find two USB 2.0 ports for keyboard and mouse over a single IEEE 1394 and powered eSATA 6 connection. Optical audio and the normal analog audio connection are present including the single Intel LAN port, unpowered eSATA and BIOS flashback feature allowing you to easily flash the system BIOS from the I/O panel.
Of course the P9X79 does feature UEFI so the term BIOS in this case is interchangeable.
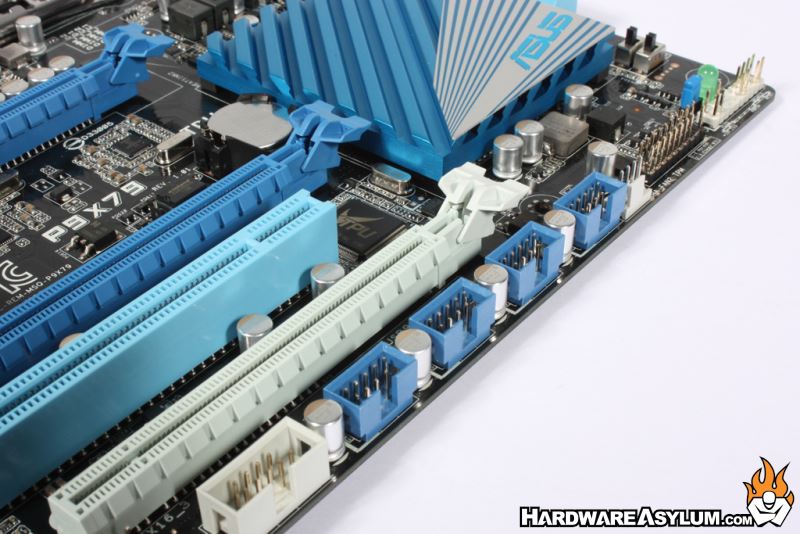
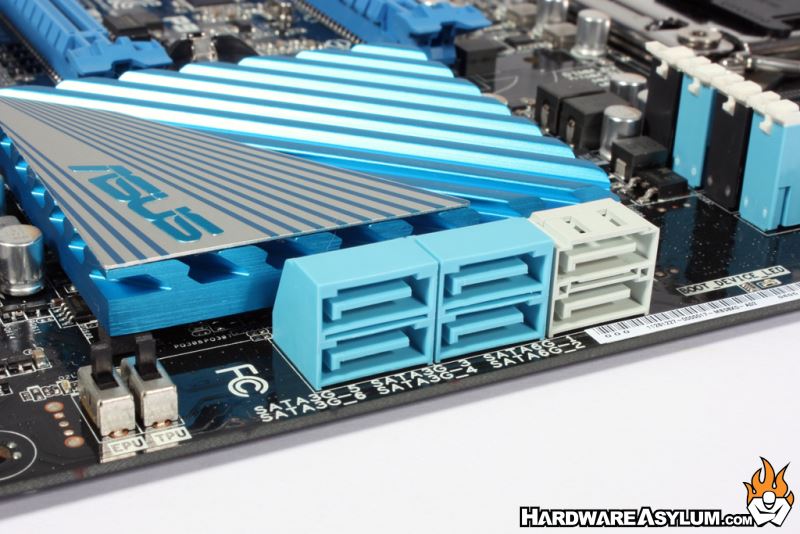
Internal SATA connections number six. The light blue connections are SATA3 spec while the white connections follow the SATA6 connections standard direct from the X79 chipset. While most will say they would rather have more SATA connections we feel that six is more than enough for a "typical" user and if you need more that is what expansion slots are for.
Internal SATA connections number six. The light blue connections are SATA3 spec while the white connections follow the SATA6 connections standard direct from the X79 chipset. While most will say they would rather have more SATA connections we feel that six is more than enough for a "typical" user and if you need more that is what expansion slots are for.