Corsair H60 Compact Watercooler Review
Author: Dennis Garcia
Published: Thursday, November 29, 2012
Installation
Installing the Corsair H60 is pretty straight forward however, we would suggest that you consult the quick smart guide with any questions you may have.
We will be testing on the LGA 1155 Sandy Bridge platform for this and the first step is to install the back plate. The backplate is adjustable to fit Intel systems by simply sliding the mounting holes to match the location on your motherboard. Much to our surprise they don't click into place making their adjustment somewhat trivial.
We will be testing on the LGA 1155 Sandy Bridge platform for this and the first step is to install the back plate. The backplate is adjustable to fit Intel systems by simply sliding the mounting holes to match the location on your motherboard. Much to our surprise they don't click into place making their adjustment somewhat trivial.
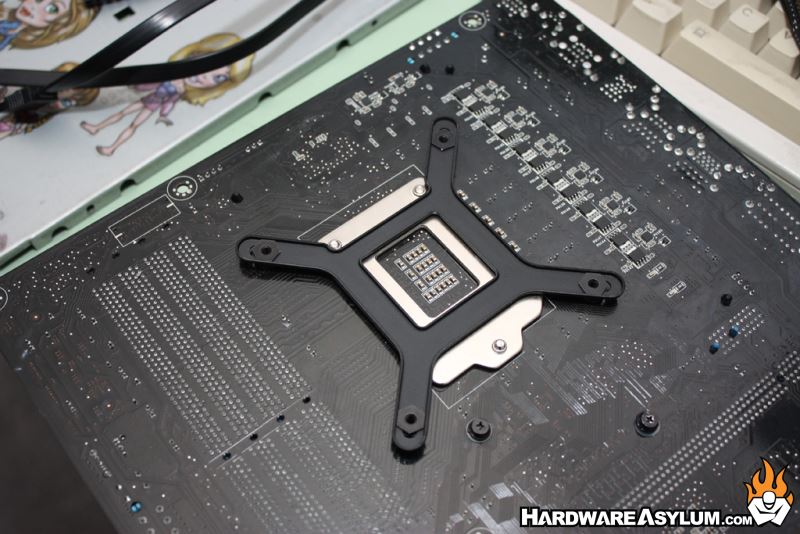
Next flip the motherboard over making sure not to move the mounting plate and install the four standoffs. The standoffs will keep the back plate from moving and serve to anchor the CPU block. Finger tight should be enough though we might suggest using a socket to snug them down.
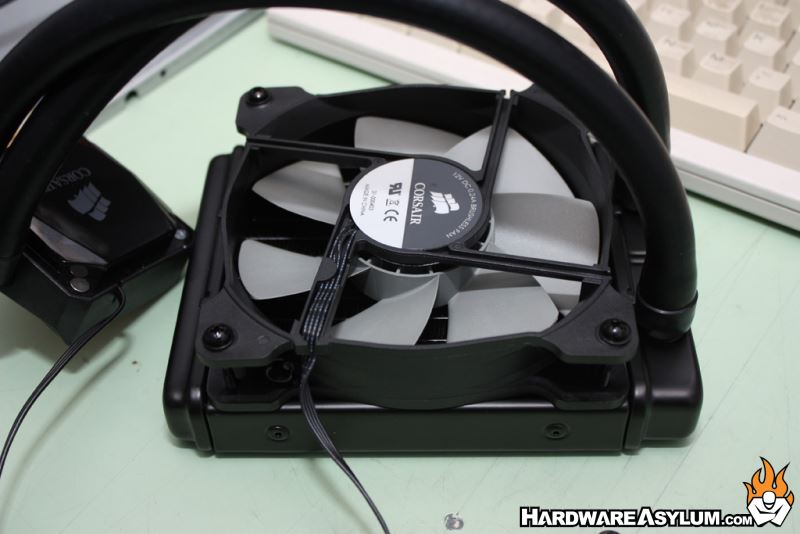
At this point it is a good idea to install the cooling fan. Always install the fan so that it is pulling air thru the radiator as that will give you the best performance. Corsair illustrates that the fan should be located between the case and radiator with airflow in the typical exhaust position.
Our configuration, shown in the photo, is typical for a test bench install and not something you would do in your chassis.
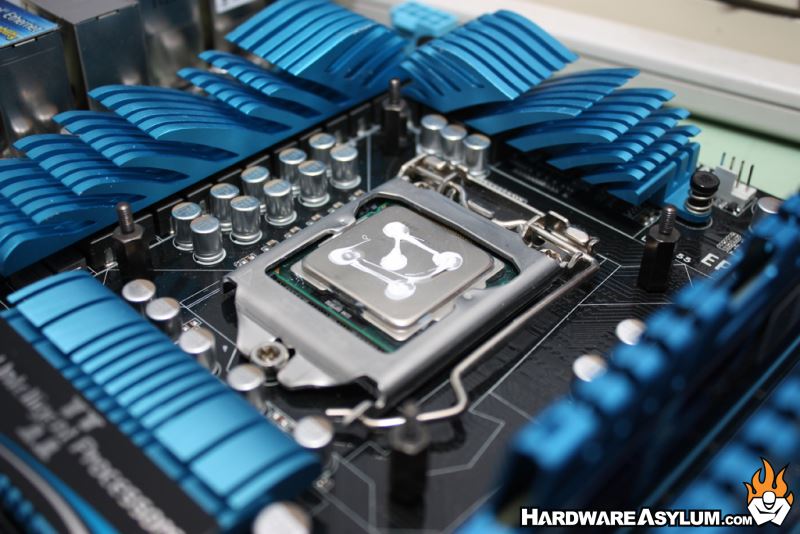
Like any good enthusiast we always apply our own thermal paste and have found the five dot method to give us the best results on modern CPUs. Do not attempt to spread the paste, touch it with your finger or use more than a quick dab from the tube. Doing so will cause air bubbles to form and not give you a good thermal connection. Once you install the waterblock the dots will spread and force out any air that may become trapped.
To complete the installation you need to install the four hole mounting bracket and secure each corner with a thumb nut. The bracket tabs provide the spring tension and begin to work after the thumb nut is fully installed.
To complete the installation you need to install the four hole mounting bracket and secure each corner with a thumb nut. The bracket tabs provide the spring tension and begin to work after the thumb nut is fully installed.