Reeven Ouranos RC-1401 Heatsink Review
Author: Dennis GarciaCooler Installation
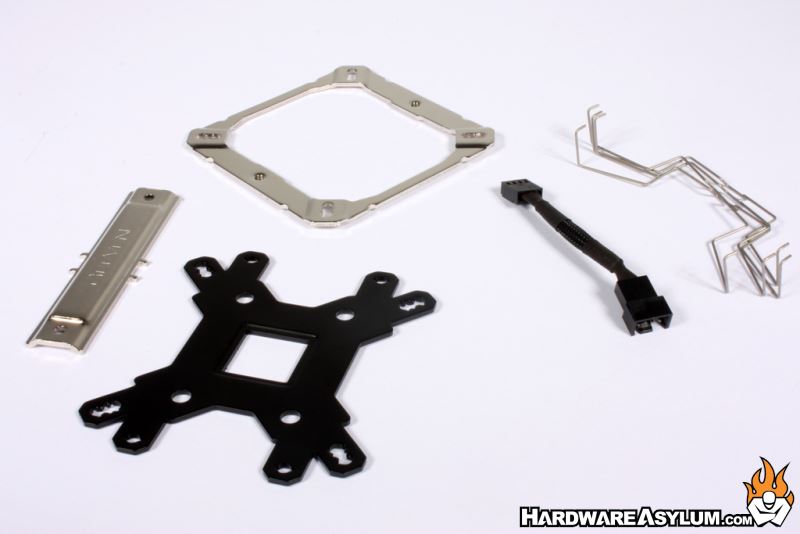
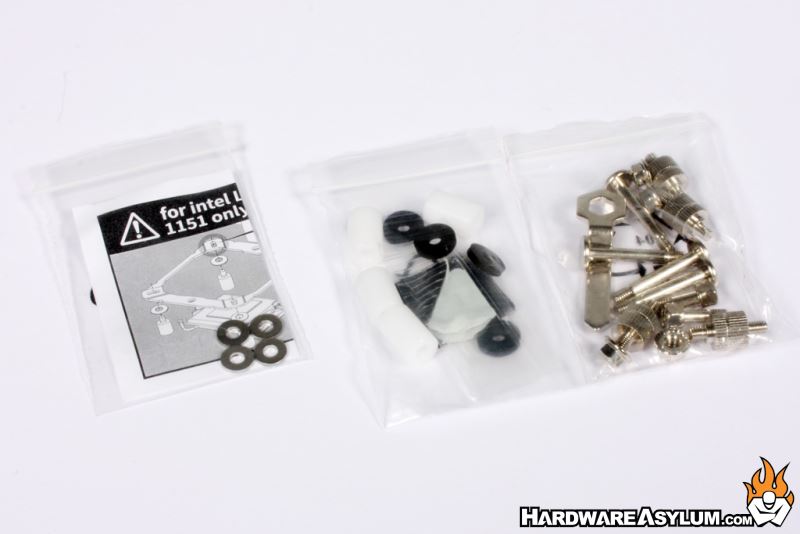
The good thing about heatsinks is that you generally only have to install them once. Installing the Ouranos is rather simple but does take a little time to complete. The hardware included is shown below and consist of a universal backplate for LGA 115x and AMD systems, top mounting plate, cross bar thing, fan clips and low noise adaptor. The bag contains all of the extra hardware you will need including stand-offs for LGA 2011 and screws to attach the mounting plates.
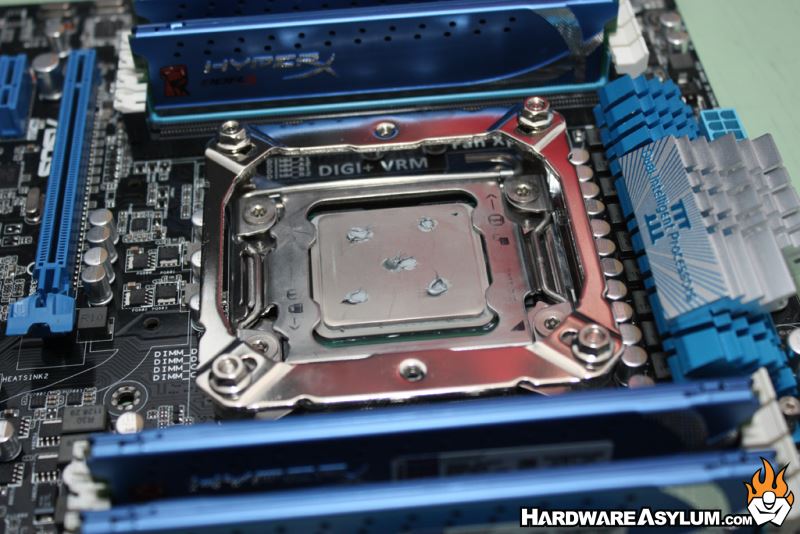
I will be testing on LGA 2011 and aside from the process of building the base the process is identical.
The first step will be to locate the threaded risers and install them into the heatsink mounting holes located around the CPU socket. These are 4mm threaded holes so be sure to match up the proper end.
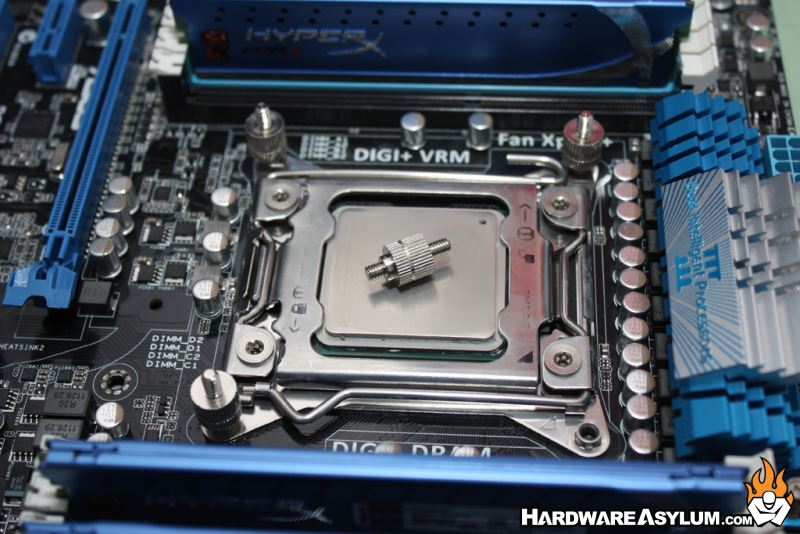
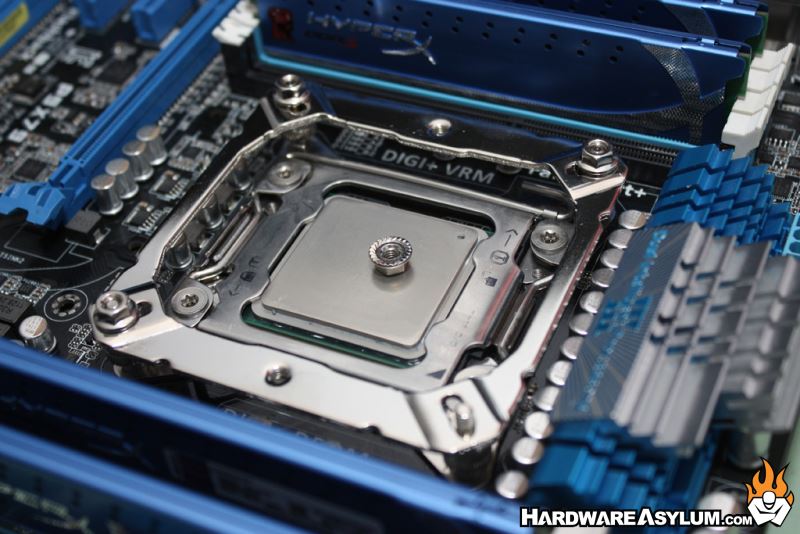
Next you'll install the mounting plate and be sure to place it so the two screw holes are oriented how you want the fan to blow. Four hex nuts are used to hold the plate down and might be one of the most difficult parts of the entire installation. Personally I would have rather seen thumb nuts used here, at least to match the riser posts.
Thermal paste is important. I prefer the 5 dot method in a pattern similar to what is shown here.
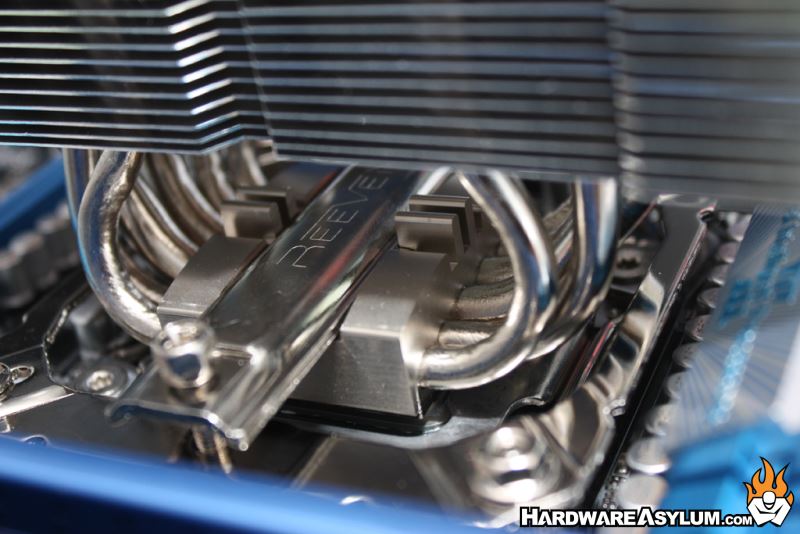
The final step is to install the heatsink. For this you will need to place the heatsink down and then pass the mounting bar through the heatsink making sure it lines up with the raised areas in the middle. It will drop on place when installed correctly.
Next install and thread down the two mounting screws making sure to alternate turns so that even pressure is applied to both sides. They will bottom out when at the proper tension. You could use the included wrench however a long Philips screwdriver is much faster.
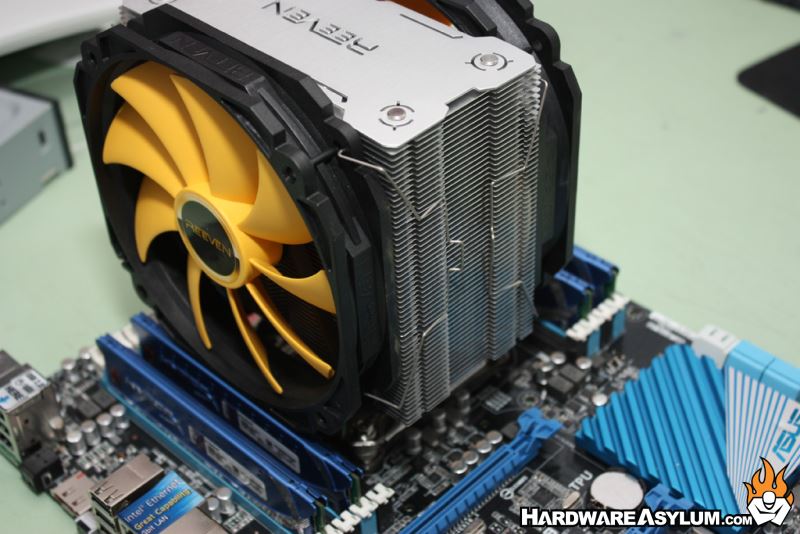
Reeven includes a single 140mm Goldwing fan and is installed using the included wire clips. As the photo shows they attach to the heatsink tower but also pass over the radiator fins making the actual attachment rather frustrating. Plug in the PWM fan header and you are done.