Cooler Master Mastercase H500 ARGB
Author: Dennis GarciaCase Interior and Storage
When tempered glass was introduced to computer cases the attachment method was similar to a curtain wall where the glass was held in place using bolts and holes in the glass. This has created some rather famous photos of people dropping the glass and having it shatter into a bunch of small chunks of glass.
I would say this is a product of how they removed the panel over how it was attached but, that argument is better left for the karma whores.
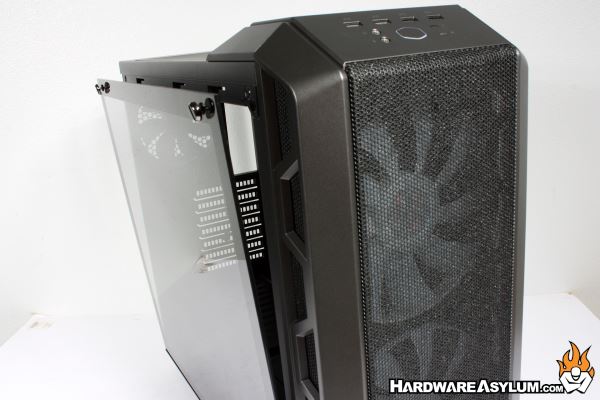
A feature found on the Maker 5t was a swing type mounting rail that allowed people to drop their panels into the case and swing them shut. That way the glass only needed to be secured at the top and removed some of the dropping danger from older designs.
This same rail option is being used on the H500 and works pretty well. Just keep in mind that glass doesn’t like to bend and forcing the panel open is a great way to test the tensile strength of tempered glass.
The H500 only features glass on one side of the case with the back being a solid metal panel. With the glass removed we can get a better look inside. You will find a large motherboard tray with three cable access holes with rubber grommets and blocks covering additional cable access holes. The motherboard tray is quite large with an even larger hole for heatsink access.
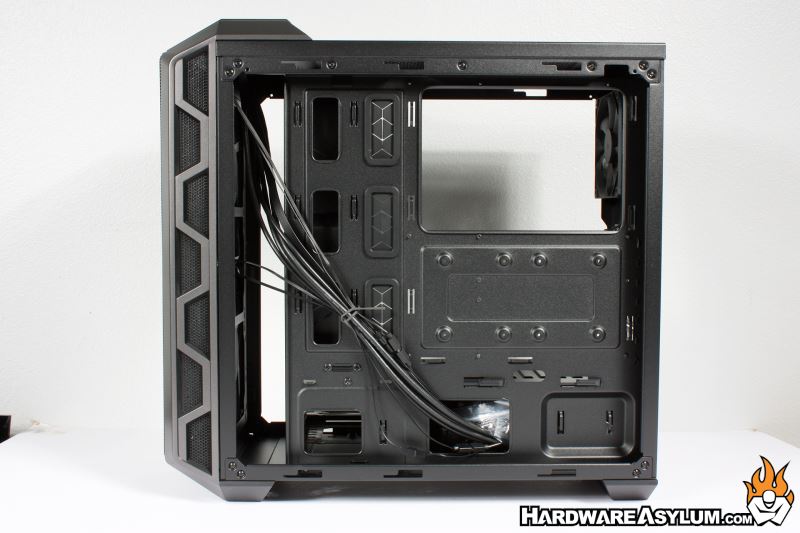
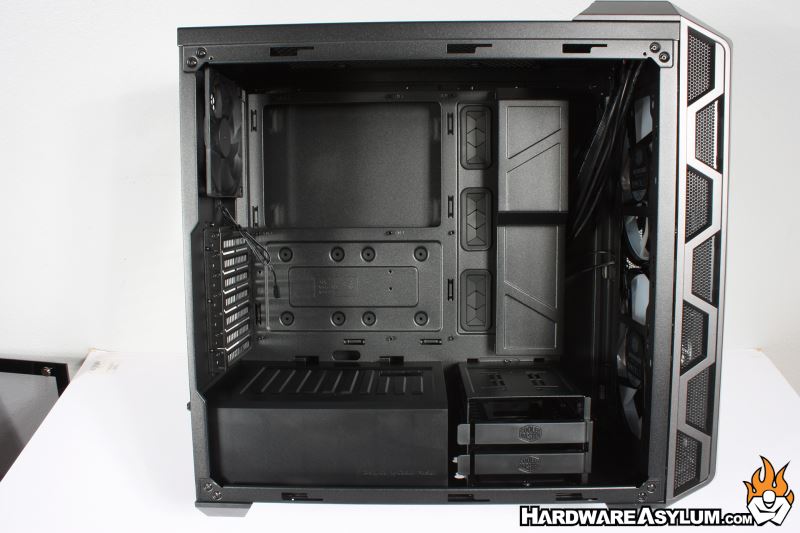
For the most part everything in the H500 can be accessed from the front side of the case. The back side of the motherboard tray is primarily for cable management and comes with well over an inch of space for running cables.
Drive access and the power supply cover appear to be taken from the Masterbox 5 design allowing you to remove them as needed. The internal drive cage is accessible from the front of the case and to the right of the power supply cover. These drive trays support both 3.5” and 2.5” drives and lock in place with a simple plastic lever. The drive cage is removable to give you more room to install additional cooling hardware.
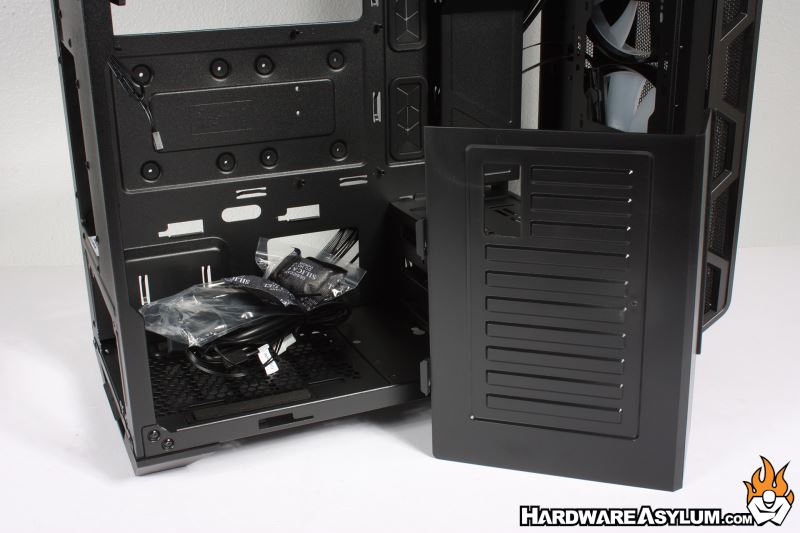

To install the power supply you will need to remove the cover that just slides away. You’ll find a cable opening for USB and front panel controls in the cover and not much else. Because of this you get some pretty good cable management options that also aid in the effort required for a PSU swap.