Cooler Master MasterBox NR200 Mini ITX Case Review
Author: Dennis GarciaInstallation and Build Photos
I won’t lie, it is pretty rare for me to actually put a build in many of the cases I review and while it might prove helpful, I also find it to be rather time consuming for the effort. However, with the Cooler Master NR200 I was compelled to throw something together as a way to show off this amazing Aorus Z490I Ultra.
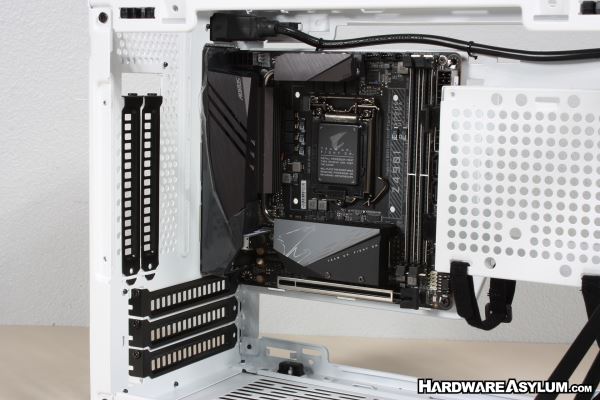
As you can see the motherboard fits in there quite well just barely clearing the extension cable and giving plenty of room for the included 120mm SickleFlow fans.
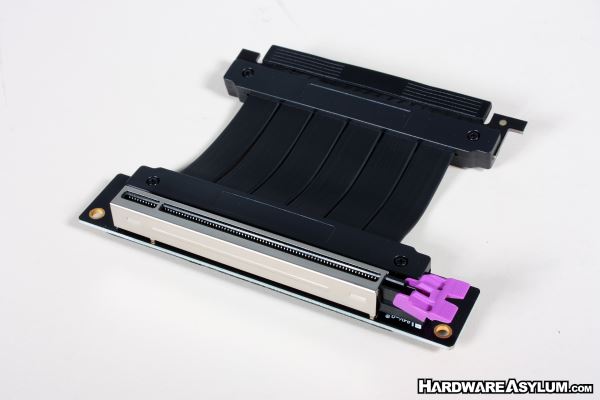
Something great about the NR200 is that you can build in this case a number of different ways. For instance, if you want to have a vertical GPU then you would use the included riser cable. This allows you to mount your AIO cooler to the bottom panel.
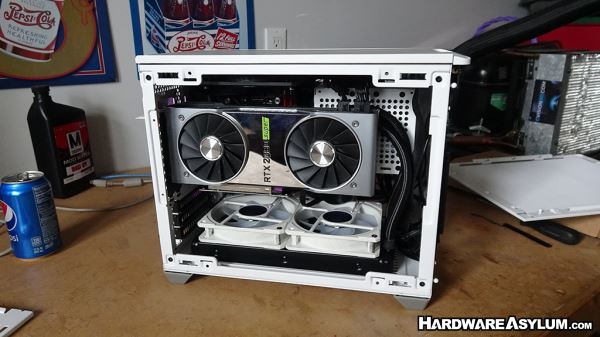
If your video card is too big or you have no interest in vertical mounted anything then you could install your video card normally an use one of the other included brackets to mount your AIO where the video card would be. Sadly, this also prevents you from using the tempered glass side panel but gives you options to choose from.
There is also an option to relocate the PSU to the front panel allowing you more room next to the motherboard but also limiting your video card and AIO radiator choices.
For this build I went with the intended SFX PSU, vertically mounted GPU, single SATA SSD and 240 AIO cooler.
The System as it was Built
Aorus Z490I Ultra
Core i9 10900K
Cooler Master V850 SFX Gold PSU
SilverStone PermaFrost FP240-ARGB AIO Watercooler
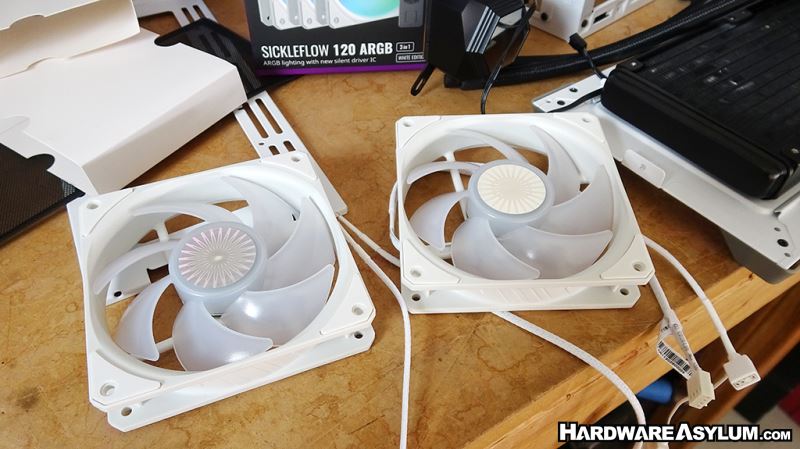
2x Cooler Master SickleFlow 120 ARGB Fans in White
Patriot P200 Performance SSD
NVIDIA RTX 2080 Super
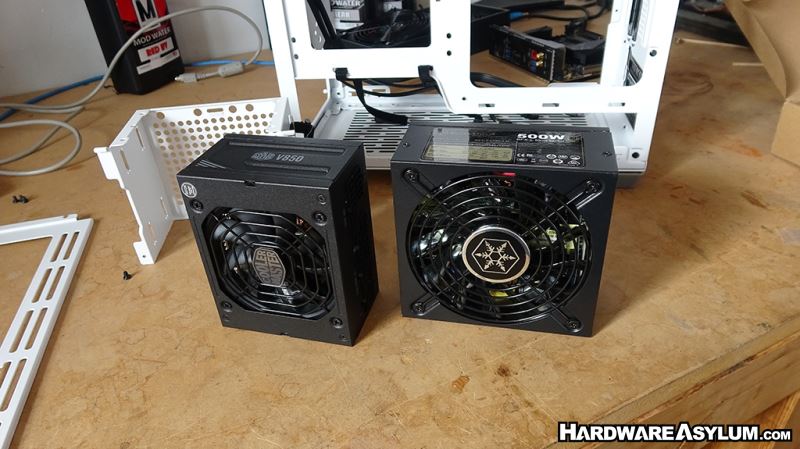
The first step is to install the PSU. I had a couple of options available in the SFX form factor. On the left is the Cooler Master V850 SFX (yes 850w in an SFX) and on the right is a SilverStone SFX-L. You can see the size difference and why the bracket might need to be moved.
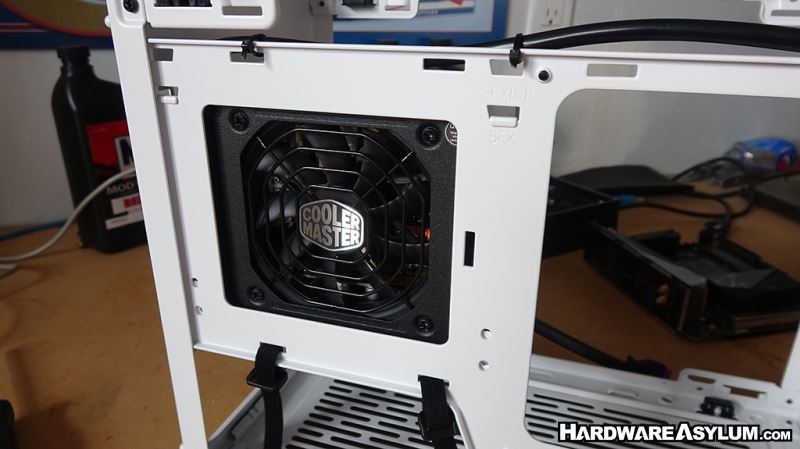
With PSU installed you get plenty of room for the cooling fan. Don’t forget to lock it in place with two standard screws.
Next we will install the SSD. Using the included mounting posts they thread into the bottom of the drive. These are the same posts used to hold the fans into the top panel and require rubber grommets to keep them in place.
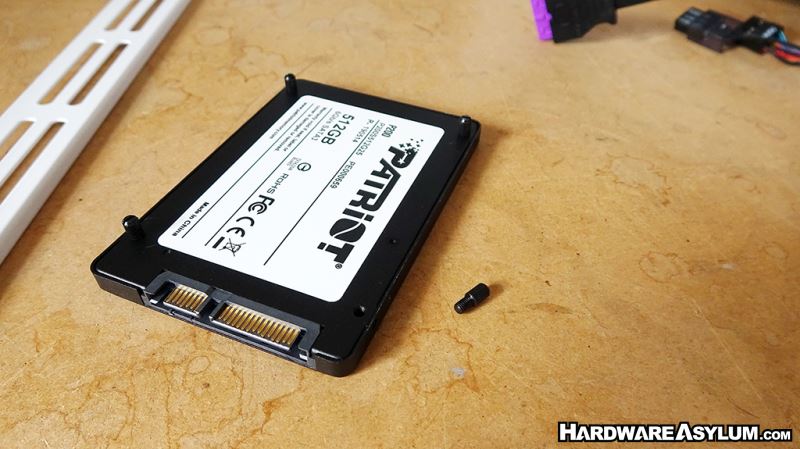
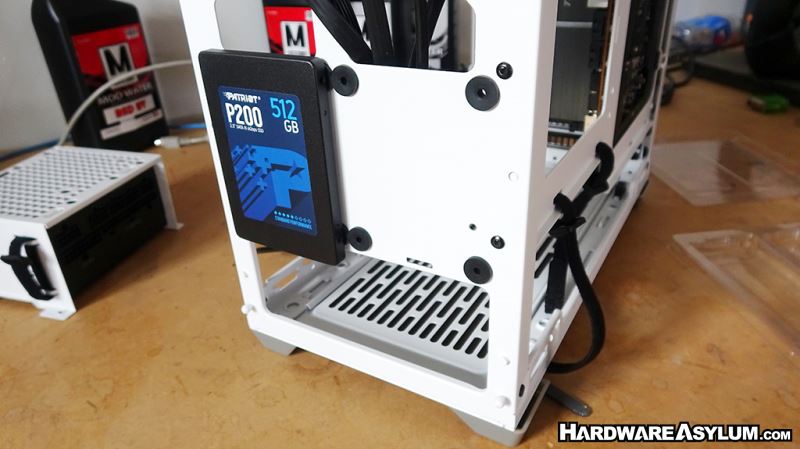
Install the grommets and away you go.
Motherboard will need to be installed. The motherboard offset posts have alignment shoulders so line up the I/O shield and snap the board in place. Don’t forget the screws.
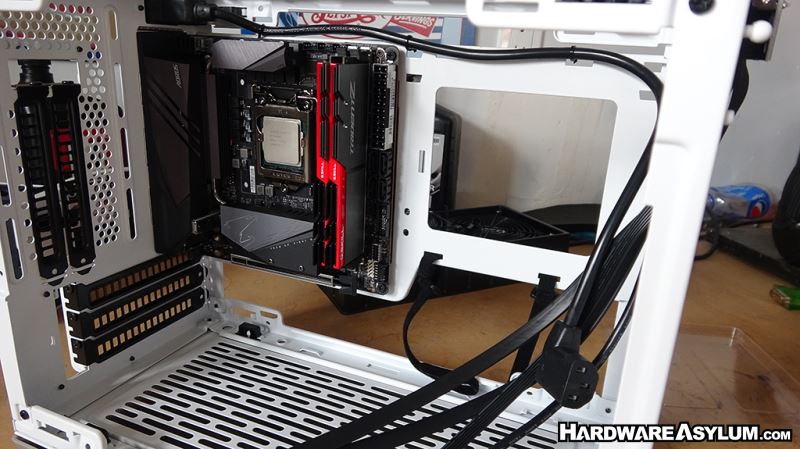
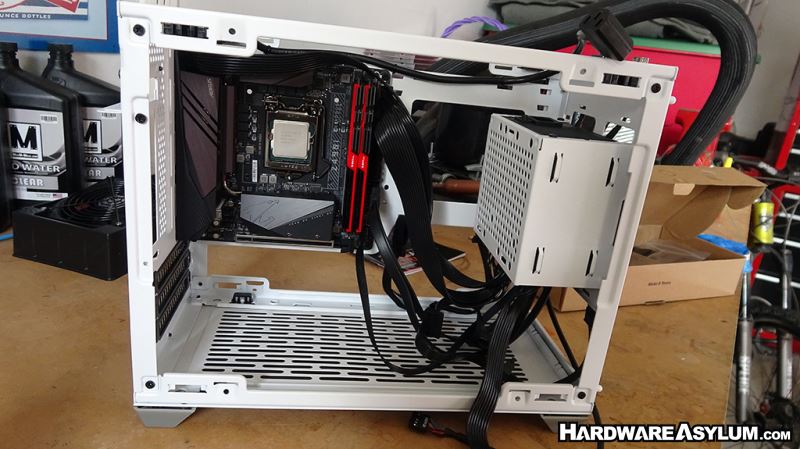
I found it easier to install with the PSU cage out of the way.
As was mentioned before you can relocate the PSU to the front panel giving you more room next to the motherboard for cables and contraband. Though you do lose the ability to vertically mount a GPU you do gain space to run longer cables if needed.

Running cables is a pain but the shorter ribbon style cables included with the V850 made things pretty easy. The hard part is getting them twisted just right lay down nice.
While I am using the SilverStone AIO in this build I opted use some SickleFlow 120 ARGB fans for a little added bling. Not only will I get RGB lights but they will be performance matched to the fans included with the NR200
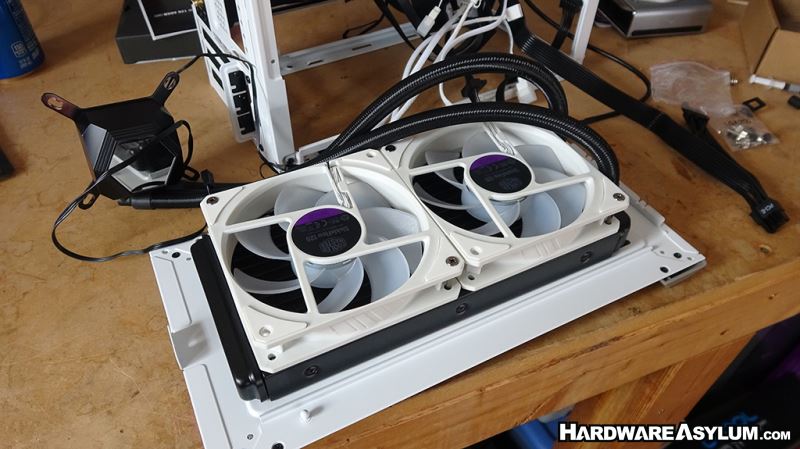

I would suggest remove the bottom panel before installing the AIO radiator as it gives you more room to install screws and such. And, it is kind fun to drop the main chassis down over everything to reinstall the panel.
The pro-tip here is to have the hoses exit toward the front of the case to clear basically everything.
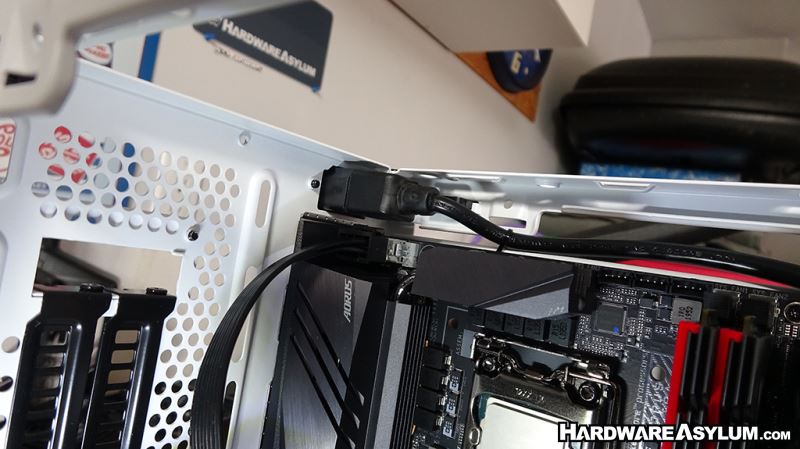
My one gripe is the location of the external power extension. The biggest part of the cable is directly over the 8-pin CPU power plug making it difficult to access. However, with the top panel removed it is much easier.
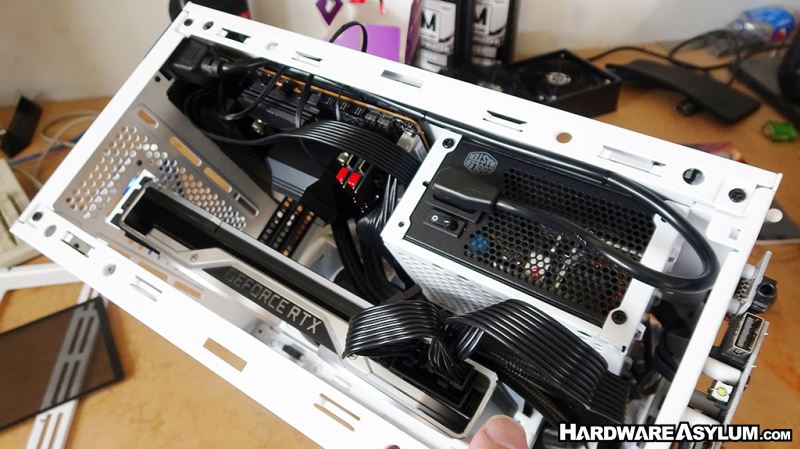
One of the final steps is to install the video card and PCI Express riser. I found cable management to be a bit tricky and while I could spend more time carefully tying up each cable, I found that most of them were hidden behind the video card, out of sight and out of mind.
And with that the build is complete. As you can see some things are hidden while others are in plain view and overall, I am not bothered by it at all. The final step is to power the build on, enable some RGB from the Aorus motherboard and enjoy a long gaming session.
With a total of four fans in this build there is plenty of airflow and quite a few options to improve cooling even more.