EK Waterblocks Classic RGB P360 Watercooling Kit Review
Author: Dennis GarciaInstalling the Classic P360 Watercooling Kit
Installing a watercooler is no different than a standard aircooler or AIO. Granted there are a few more steps however, none of them are all that difficult. For this review I’m doing a bench setup meaning the cooler will be setup outside a case which is done mostly for ease of use and access.
Lets start with the CPU block.
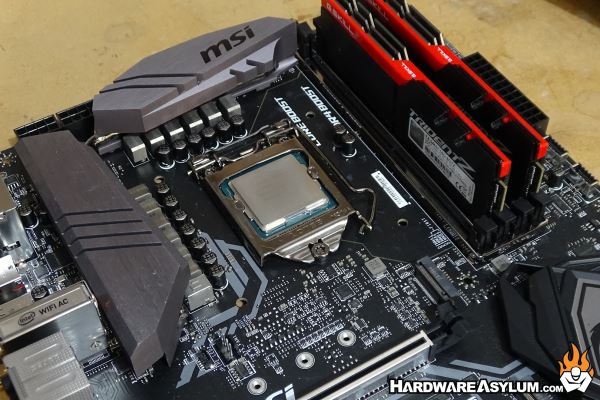
The EK Supremacy is a very well made waterblock with a solid mounting system. I’m using a MSI Z390 Ace as my motherboard platform and Intel Core i9 9900K processor and require that you install a backplate to support the motherboard and give support to the mounting posts.
First fit the rubber gasket around the CPU socket making note that the openings line up with the mounting holes on the motherboard.
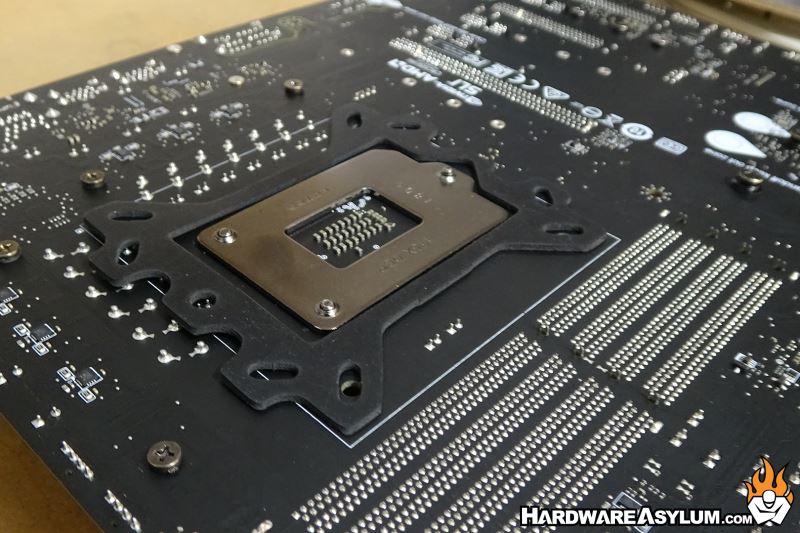
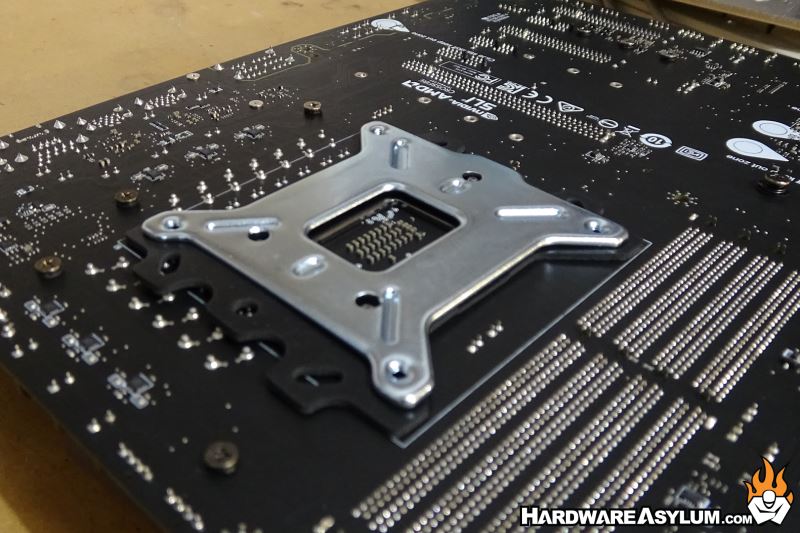
Next place the backplate over the rubber gasket lining up the three screw holes on the socket and the four mounting holes on the motherboard.
Flip the board over and install the mounting posts. They have a threaded shoulder to lock the backplate to the PCB. Be sure not to forget the nylon washers as these also help to protect the PCB surface.
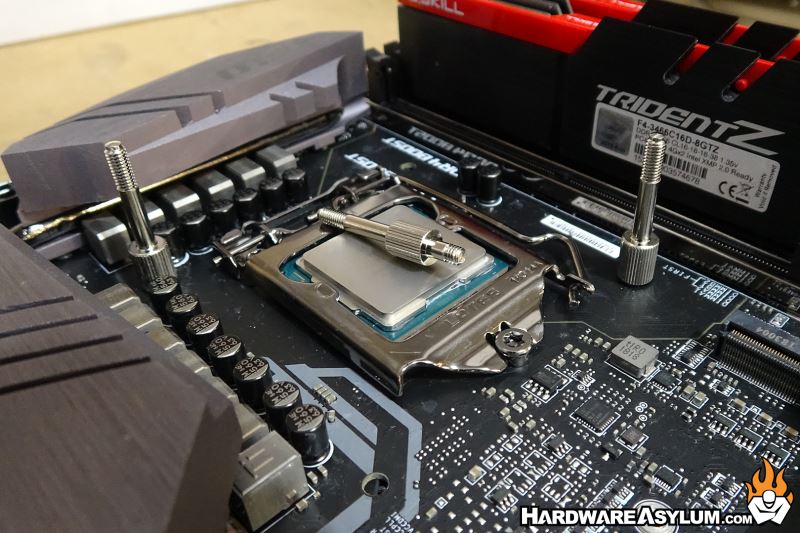
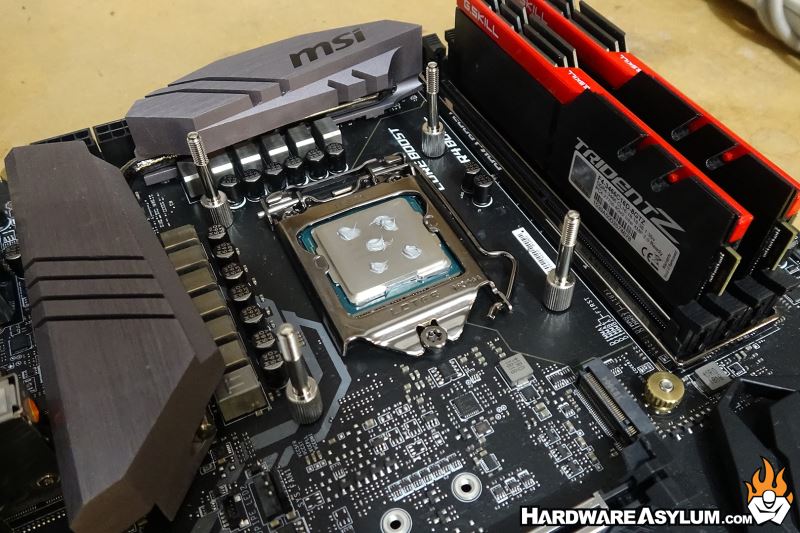
Thermal paste is next. I prefer, and recommend, the 5 dot method as illustrated. EK has included a small tube of thermal compound so feel free to use that or any other compound you happen to like that month.
The final stage is to install the waterblock. Simply slide the mounting rails over the posts, install a spring to each post and use the screw cap to secure everything into place. I would recommend even pressure at each corner with a half turn at each corner moving in an X pattern.
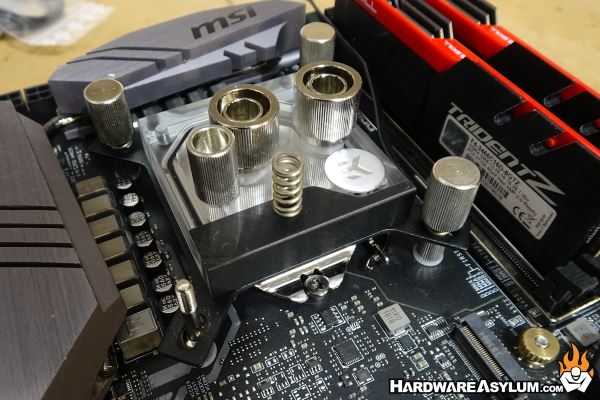
Or follow what EK recommends in the excellent manual.
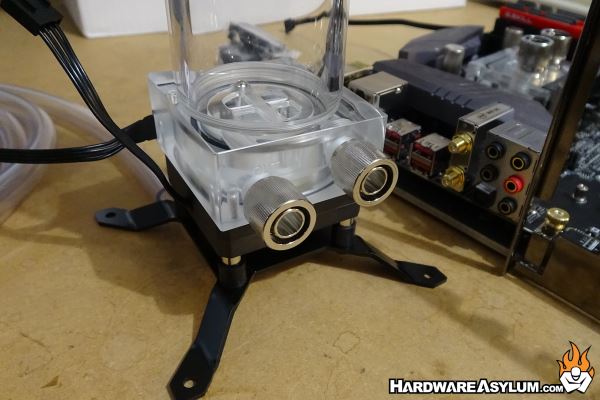
The only thing you need to do for the Pump Res combo is install the included fittings and determine how it will be mounted in your case. I’m using the included 120mm fan mounting option to keep it from tipping over.
Fans need to be installed on the radiator. EK has included their Vardar fans with RGB lighted centers.
I am happy to report that the EK documentation has illustrated the “correct” way to install fans on a radiator with them pulling the air though the fins.
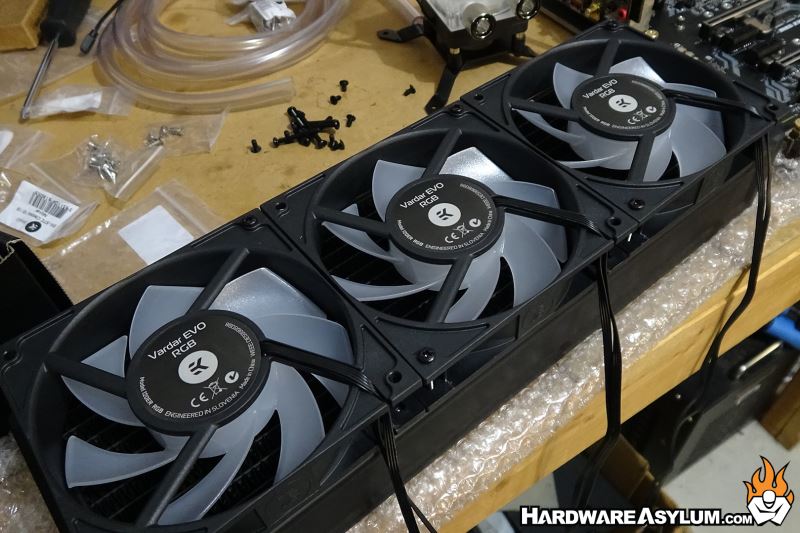
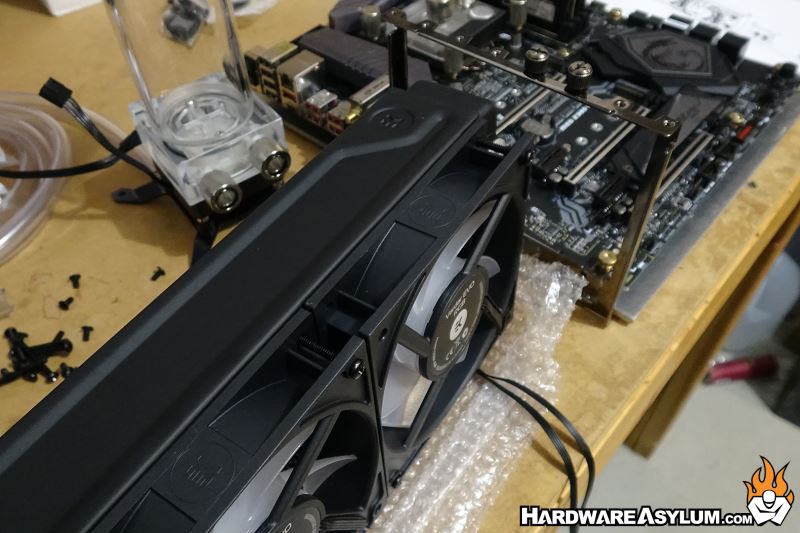
Install the three fans using the included hardware and pay special attention to where the fan tails are located that will save you time and headache when it comes time to wire everything up in your case.
The final step is to install the tubing and fill the loop. EK has a recommended flow path in their documentation. Starting from the pump the outlet hose first goes to one side of the radiator. From the radiator the outlet hose goes to the center barb on the CPU block. From the cpu block the outlet hose will go back to the pump.
Start to finish the setup took me 30minutes. I would estimate a two hour install if this kit was being installed into a chassis and split mostly between finding a location for the pump res combo and getting the radiator installed, then later reinstalled because you screwed up with the fan placement. The trick is to take your time and fully expect that not everything will work out like it does on the Internet