Noctua NH-U12S Redux Heatsink Review
Author: Dennis GarciaNoctua NH-U12S Redux Installation
I tested the NH-U12S Redux on a variety of different systems and for this review I’ll walk you through the process of installing the cooler on any LGA 1200 motherboard. These instructions will apply to any of the mainstream Intel sockets and aside from the backplate the process is nearly identical for other systems too.
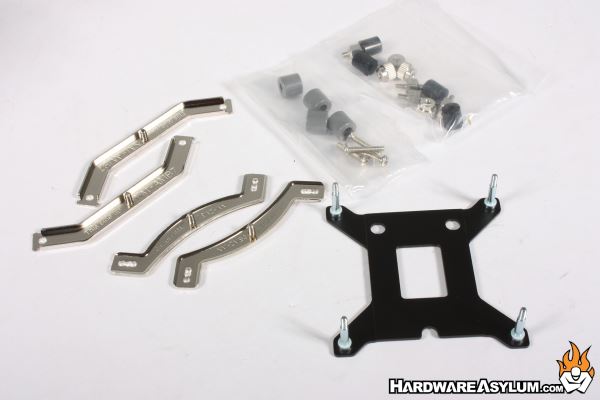
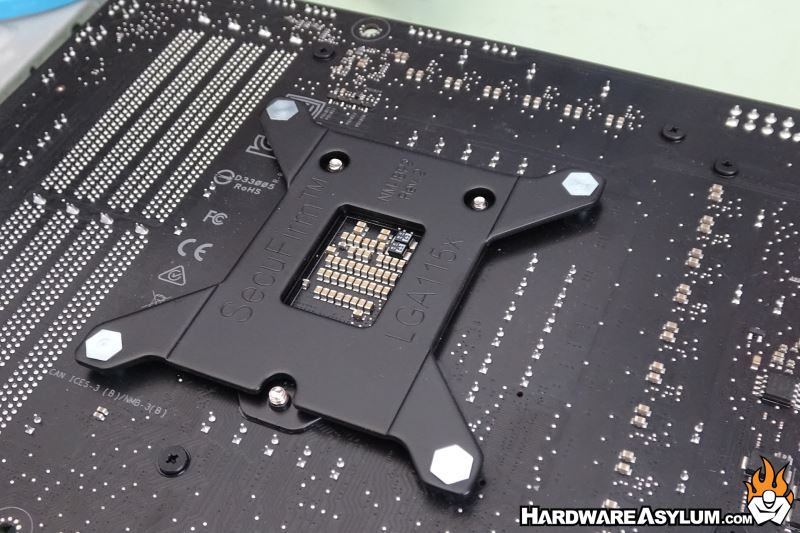
The first step will be to locate and install the included backplate. You will need to align the holes with the bolts on the CPU socket and then flip the motherboard over.
Next locate the plastic spacers and slide them over the four posts from the backplate. This will start the process to build up the mounting platform for the heatsink.
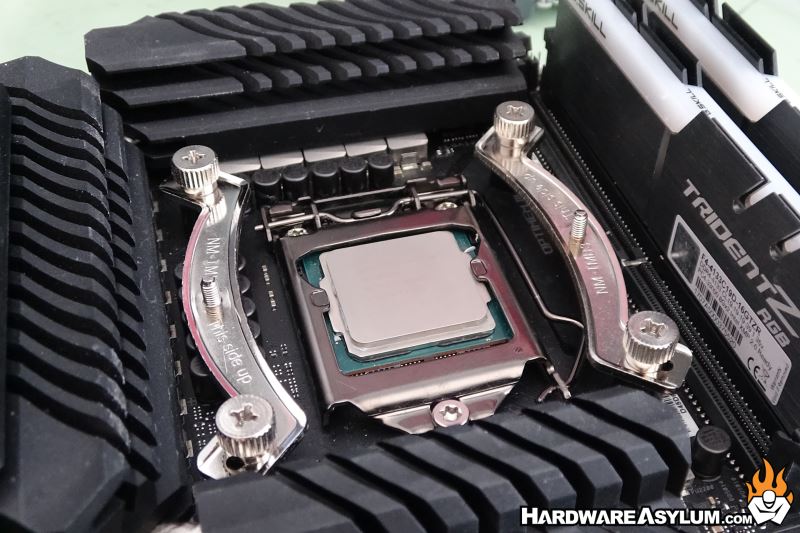
All systems will require installing the mounting rails. These are directional so consult the manual for the proper orientation for your system. On LGA 1200 they are positioned with the bow outward. It should be noted that the threaded posts will align perpendicular to the fan and will indicate the direction of airflow and how the tower will be oriented.
There are four capped bolts that secure the rails to the backplate mounting posts. These do not need to be excessively tight, just snug and, you can do this with your fingers. (or a screwdriver)
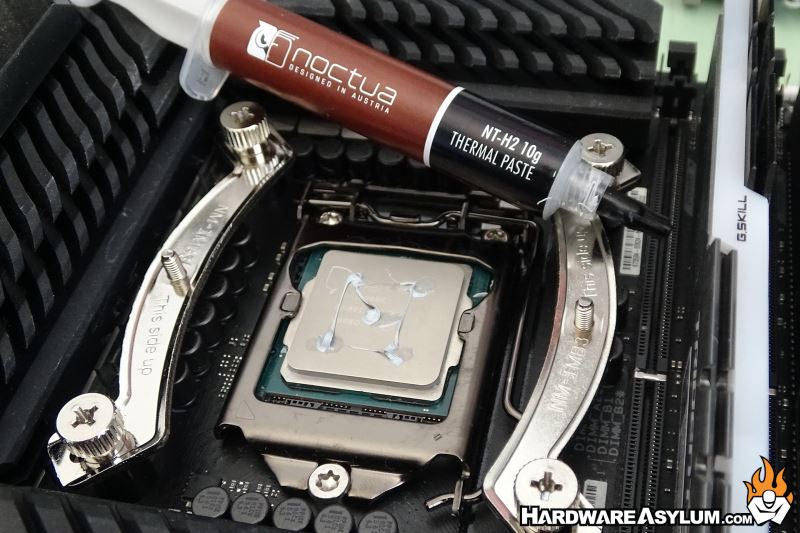
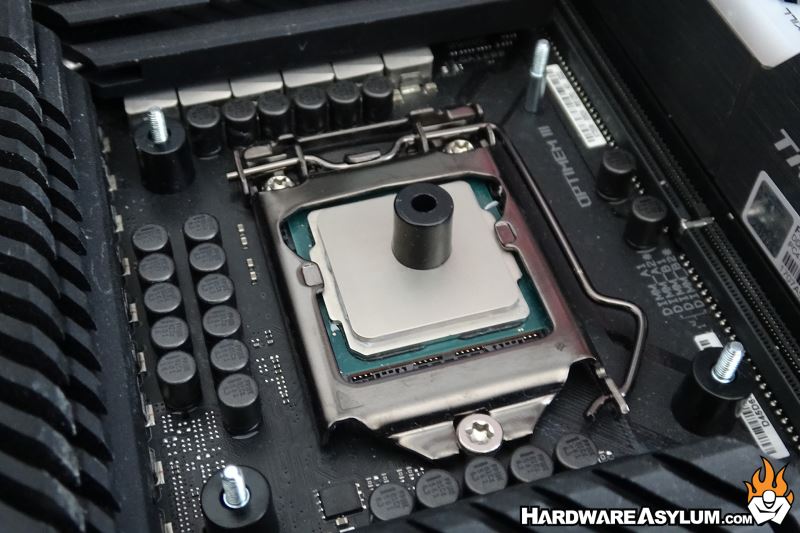
At this point I like to install the thermal compound. I prefer the 5-dot method, simply dab five blobs of paste in the pattern pictured and you are set. For this review I’ll be using the Noctua NT-H2.
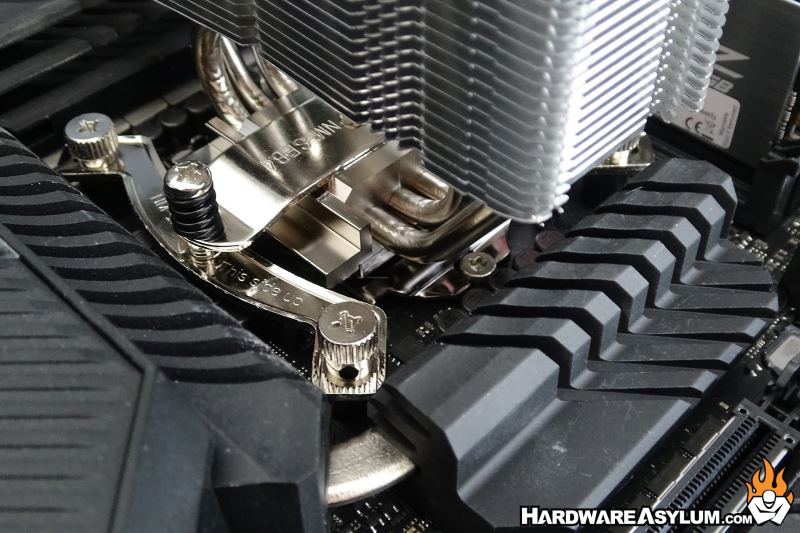
The next to last step is to install the cooler. It is common for Noctua coolers to be slightly offset to allow room for the fan to be installed and still clear memory modules and various motherboard heatsinks. Place the cooler over the threaded posts and progressively tighten the spring screws until they bottom out. I would suggest single turns per screw in an alternating pattern.
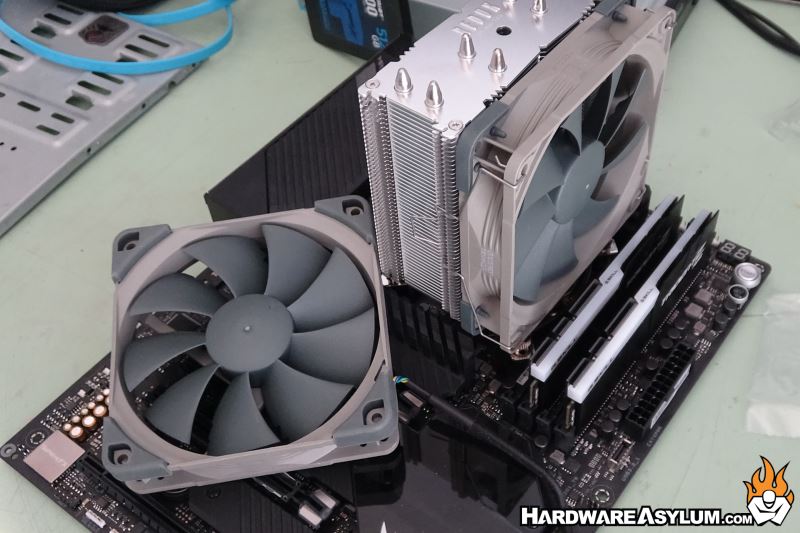
Finally install the fans and will lock to the cooler using the hooks along the edge. Just make sure to correctly align the airflow. A good rule of thumb is that air will always flow towards the exposed motor, aka the part of the fan that holds the motor.