SilverStone Hydrogon D120 ARGB Dual Tower CPU Cooler Review
Author: Dennis GarciaSilverStone Hydrogon Installation
The Hydrogon has a very interesting installation procedure that allows you to complete everything without altering the cooler. I find this concept to be something that more heatsink makers should follow as it removes many of the problems plaguing first time system builders and helps save time on the assembly line for an OEM.
However, while you can install the heatsink without removing the cooling fans the mounting system is a different story.
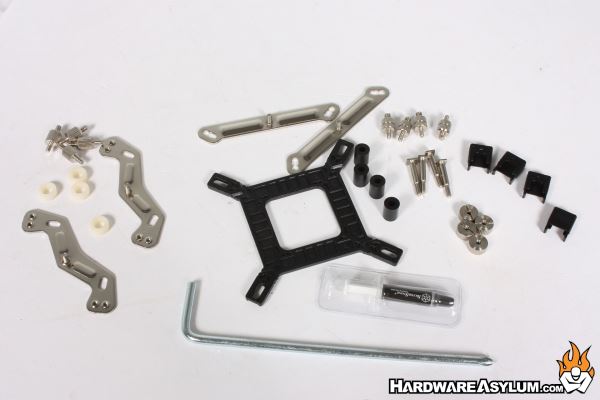
In the box you get everything you see here. There are parts for every major processor platform from LGA 1XXX to LGA 2XXX and AMD. We will be testing on LGA 1200 which means we will need to assemble the backplate and use most of the components.
The first step is to assemble the backplate and this is done in three steps. To start the mounting pin needs to be installed into the slot located on the backplate and then the locking tab needs to be installed. The tab helps you locate where the pins need to be and keeps the pin from falling out.
To ensure the tab is installed correctly it must SNAP around the mounting pin. The pin on the left is done correctly while the pin on the right is not. The pin on the right will stay in place but, can easily fall out if you fiddle with the adjustment.
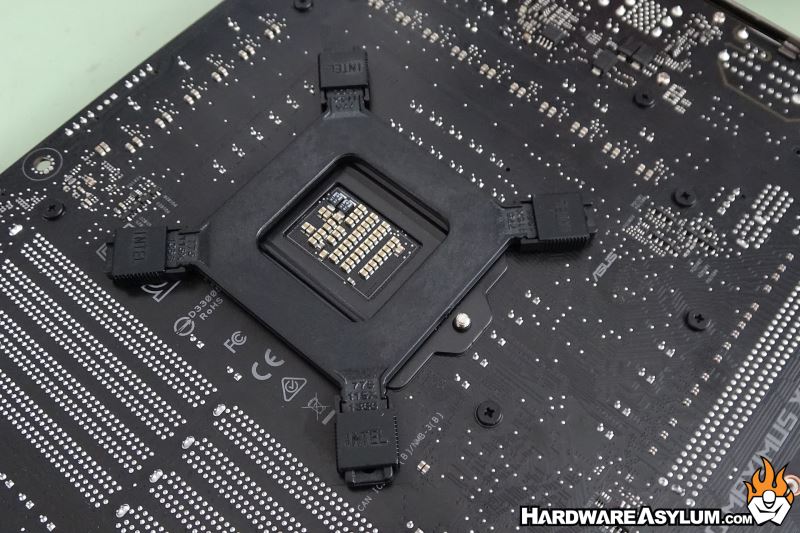
After that, install the backplate and flip the motherboard over.
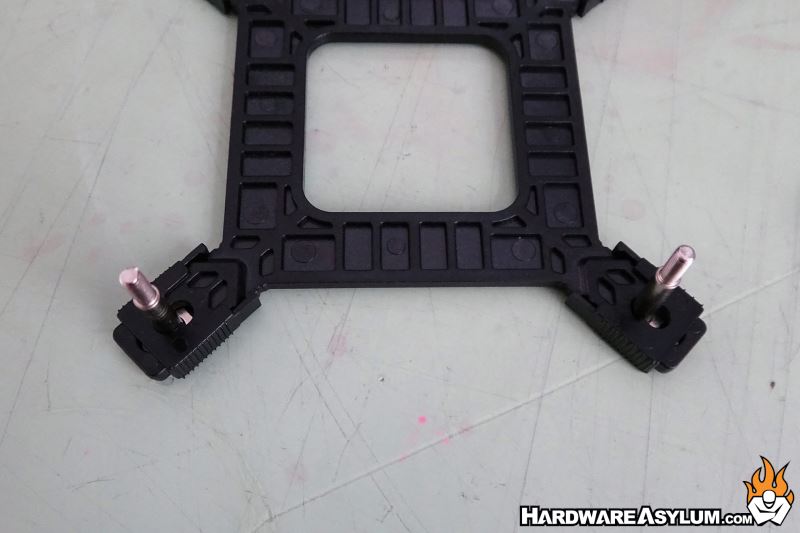
As with most “built up” style mounting systems you a have a spacer that needs to be installed, a mounting rail that needs to be located and a large nut to hold everything in place.
The heatsink installs on the two center threaded posts and these posts need to be 90 degrees of your desired fan flow position. I want the fans to exhaust towards the back of the case across the I/O connectors so the posts need to be vertical to the motherboard.
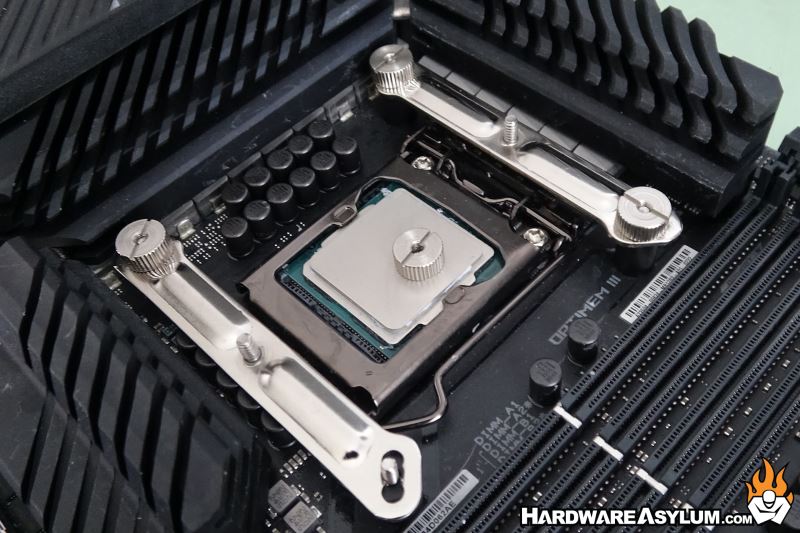
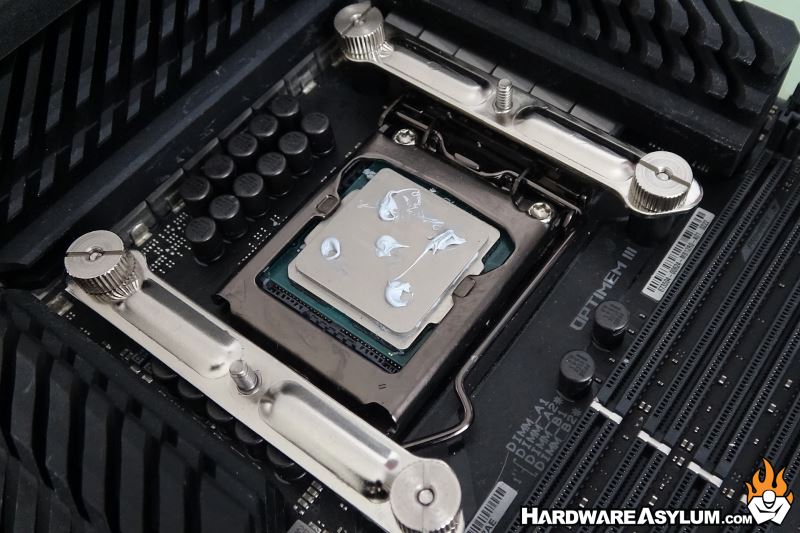
SilverStone includes a tube of thermal compound that must be installed before installing the cooler. As always I’ll be using the 5-dot method which creates an even distribution of thermal compound across the entire CPU.
To secure the heatsink you need to position the cooler on top of the threaded posts so that the captured nuts will thread down them. You will then use the included “long” screwdriver to slowly tighten each screw until they bottom out.
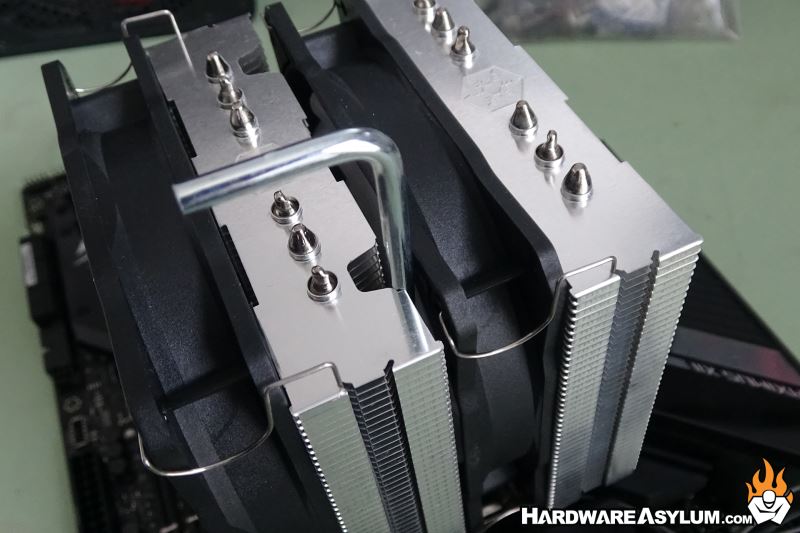
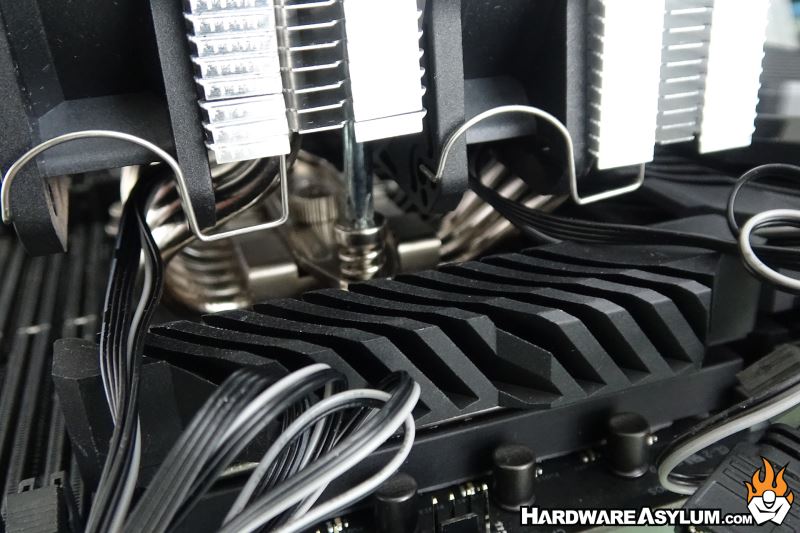
It is important to alternate between the screws so that the heatsink will sit flat AND properly spread the thermal compound. Locking the heatsink down at an angle will tend to push the TIM out the side and just makes a mess.
To be honest the entire process was similar to installing any Noctua based heatsink and yet seemed more difficult due to having to build the backplate system. The long screwdriver was also a poor fit to the Philips headed nuts allowing it to slip out and slow down the process.
For the effort I would have rather remove the center fan and use a proper nut driver to secure the heatsink and then replace the fan.