How to Insulate for Single Stage Phase Cooling
Author: Dennis Garcia
Published: Tuesday, May 17, 2011
Kneaded Eraser Application
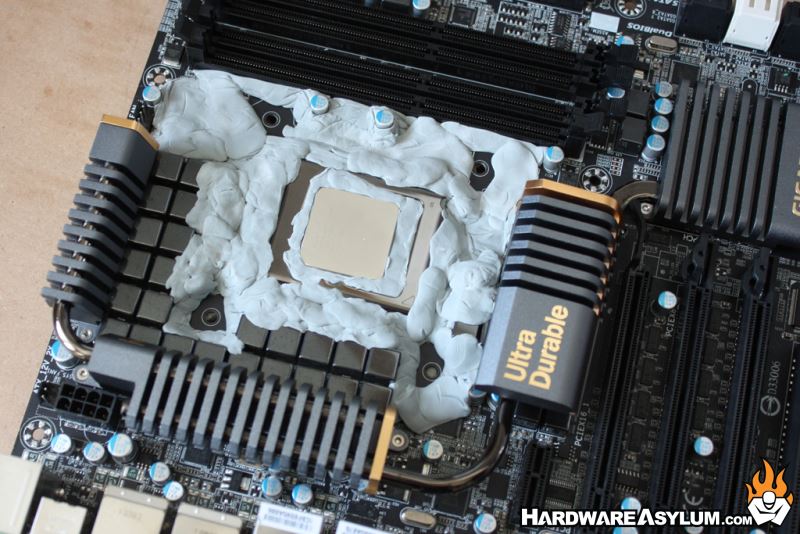
Covering large areas is easiest by pulling the eraser into a thin strip and placing it over the exposed area. The 90 degree edges near memory slots or around surface components benefit best from round pieces that are stretched to length. For everything else I would suggest dime sized chunks mashed into place and then built up with additional layers as needed.
Begin at the processor and move out about 3 inches from there. A phase cooler doesn't have enough power to freeze much more than an inch from the CPU however frost condensation can travel quite a ways once it has melted so pay special attention to areas where water can pool up.
Some will tell you my first step isn't required but I like to fill in the gaps around the CPU to prevent any water from getting to the processor. Of course a properly sealed phase cooler will not require this step so use your own judgment.
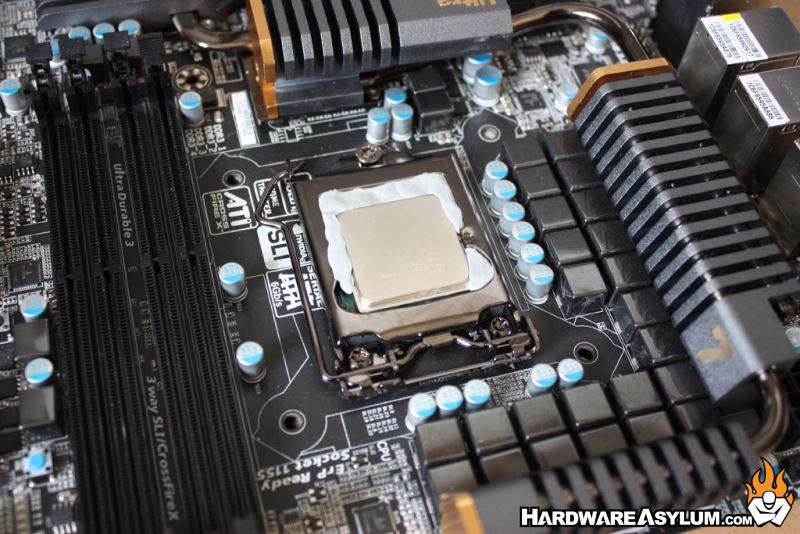
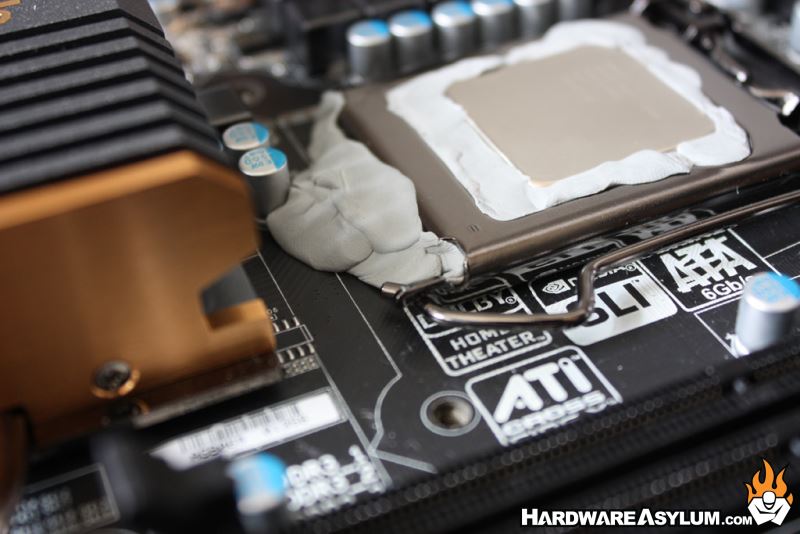
After sealing up the gaps around the cpu I move to seal up around the latch and slowly work my way out from there.

Personally I find it best to insulate everything but the heatsink holes before installing the mounting hardware, that way I have 4 less things to insulate around and more room to work.
I am not OCD when it comes to overclocking or my presentation of kneaded eraser insulation. Having done this a few times I know when it is sealed up good so who cares if there are a few fingernail impressions and visible surface imperfections. Just keep in mind that the job of the kneaded eraser is to seal up the electronic components both from outside air and any water that may drop down on the motherboard, beyond that you're just showing off.
I am not OCD when it comes to overclocking or my presentation of kneaded eraser insulation. Having done this a few times I know when it is sealed up good so who cares if there are a few fingernail impressions and visible surface imperfections. Just keep in mind that the job of the kneaded eraser is to seal up the electronic components both from outside air and any water that may drop down on the motherboard, beyond that you're just showing off.