EVGA DG-87 Gaming Chassis Review
Author: Dennis GarciaCase Layout and Features Continued
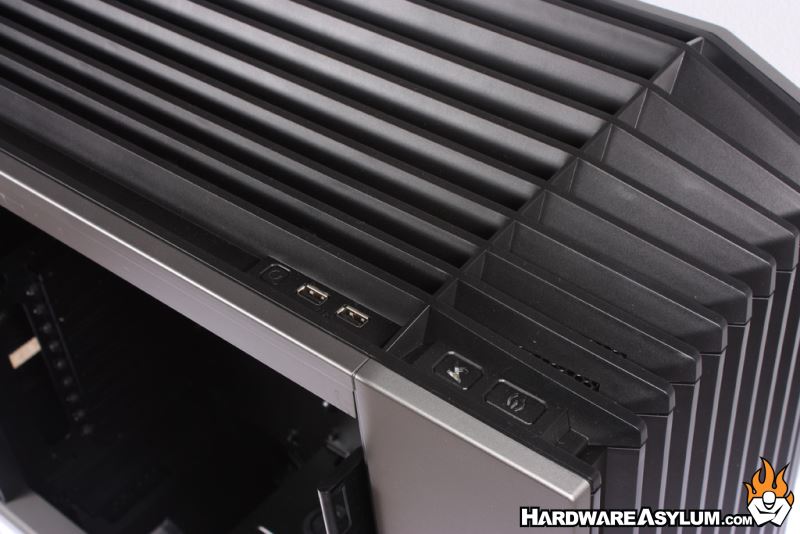
External controls are located in two places on the EVGA DG-87. You will find Power, Reset and K-Boost buttons at the top of the case along with and two USB 2.0 ports.
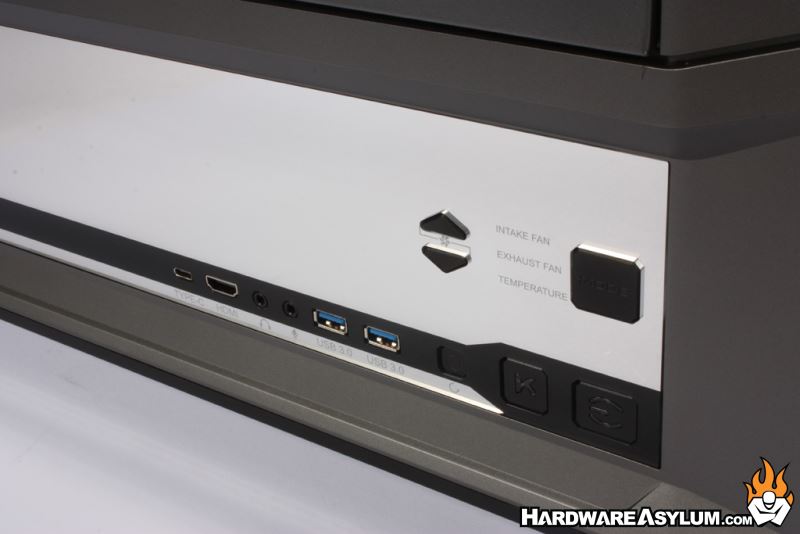
At the bottom of the case under the large window you’ll find a long mirrored strip. At the right side of that strip is another set of Power, Reset and K-Boost buttons along with two USB 3.0 ports a USB 3.1 Type C connection, HDMI and audio jacks for Mic and Headphone.
Above that is the built in fan controller. Pressing the large button will switch between showing the temperature and speed percentage of the Intake and exhaust fans. The LED display is located to the left of the arrow buttons and will show through the mirror.
One of the only hardware items not to be completely covered is the power supply. You will find it located at the bottom of the case and surrounded by a decorative panel. At the top you’ll see a warning saying “Not a Handle” which is referring to the panel above.
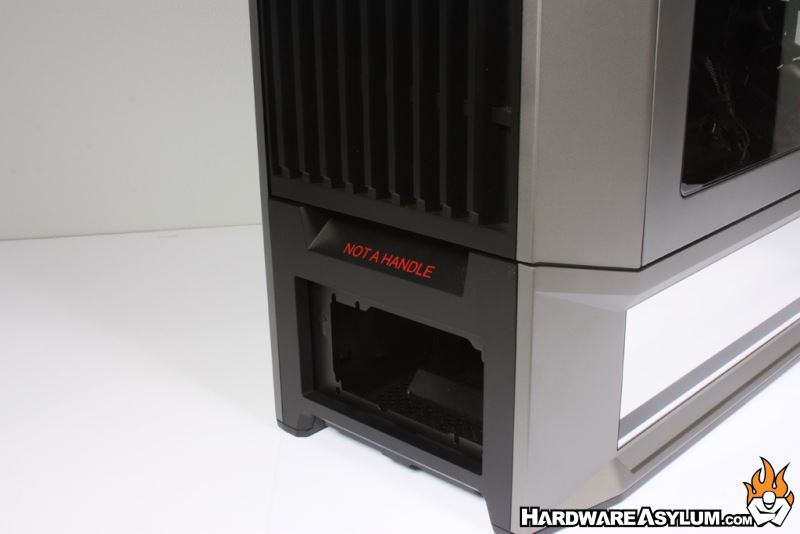
Honestly, with the lack of any integrated carry handles I have found myself lifting the case by the “Not a Handle” location a few times. The door is quite strong but clearly shouldn’t be supporting 80 pounds of case and hardware.
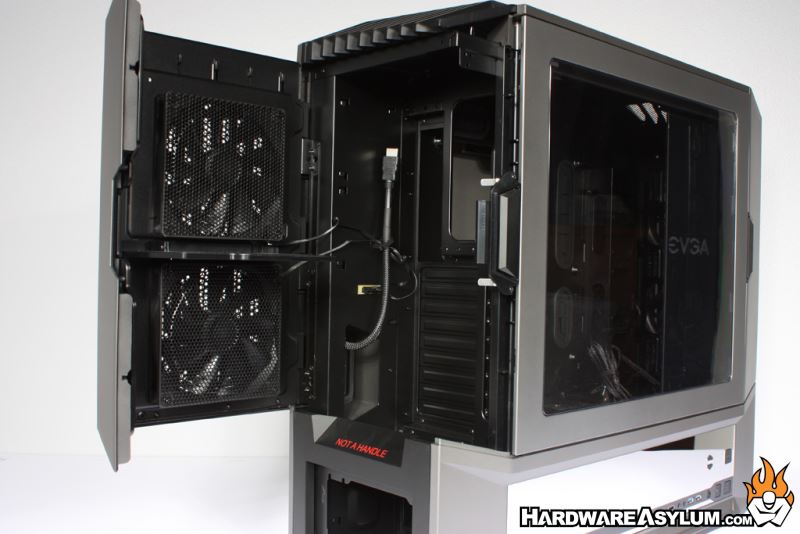
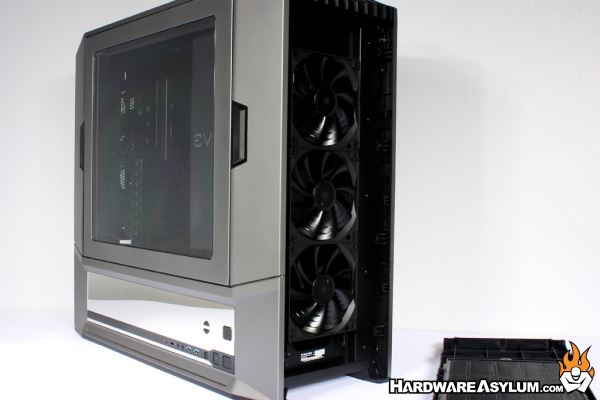
Opening the left side door exposes the normal I/O panel, expansion slots and gives you an idea about how cables need to be routed to get outside the case. The HDMI cable shown in the photo is an extension used to provide a video signal to the front of the case. This can be helpful for those of you using VR headsets and is quite similar to what EVGA did with the GTX 980Ti VR edition just without the special card and break out panel.
On the door panel you’ll find two of the three fans controlled by the exhaust side of the fan controller. A divider helps control airflow to ensure there is enough vacuum to pull air across the video cards. One thing I noticed is that you are required to bundle your I/O cables so that the door will close which also shortens total length of the cable in the process.
Intake air is handled by three 140mm fans located on the right side of the case and are controlled by the intake side of the fan controller. Push style spring clips hold the panel in place allowing easy access for cleaning.